Traditional Cedar Shake Roof Replacement
This article is a work in progress
Updated: August 20, 2025
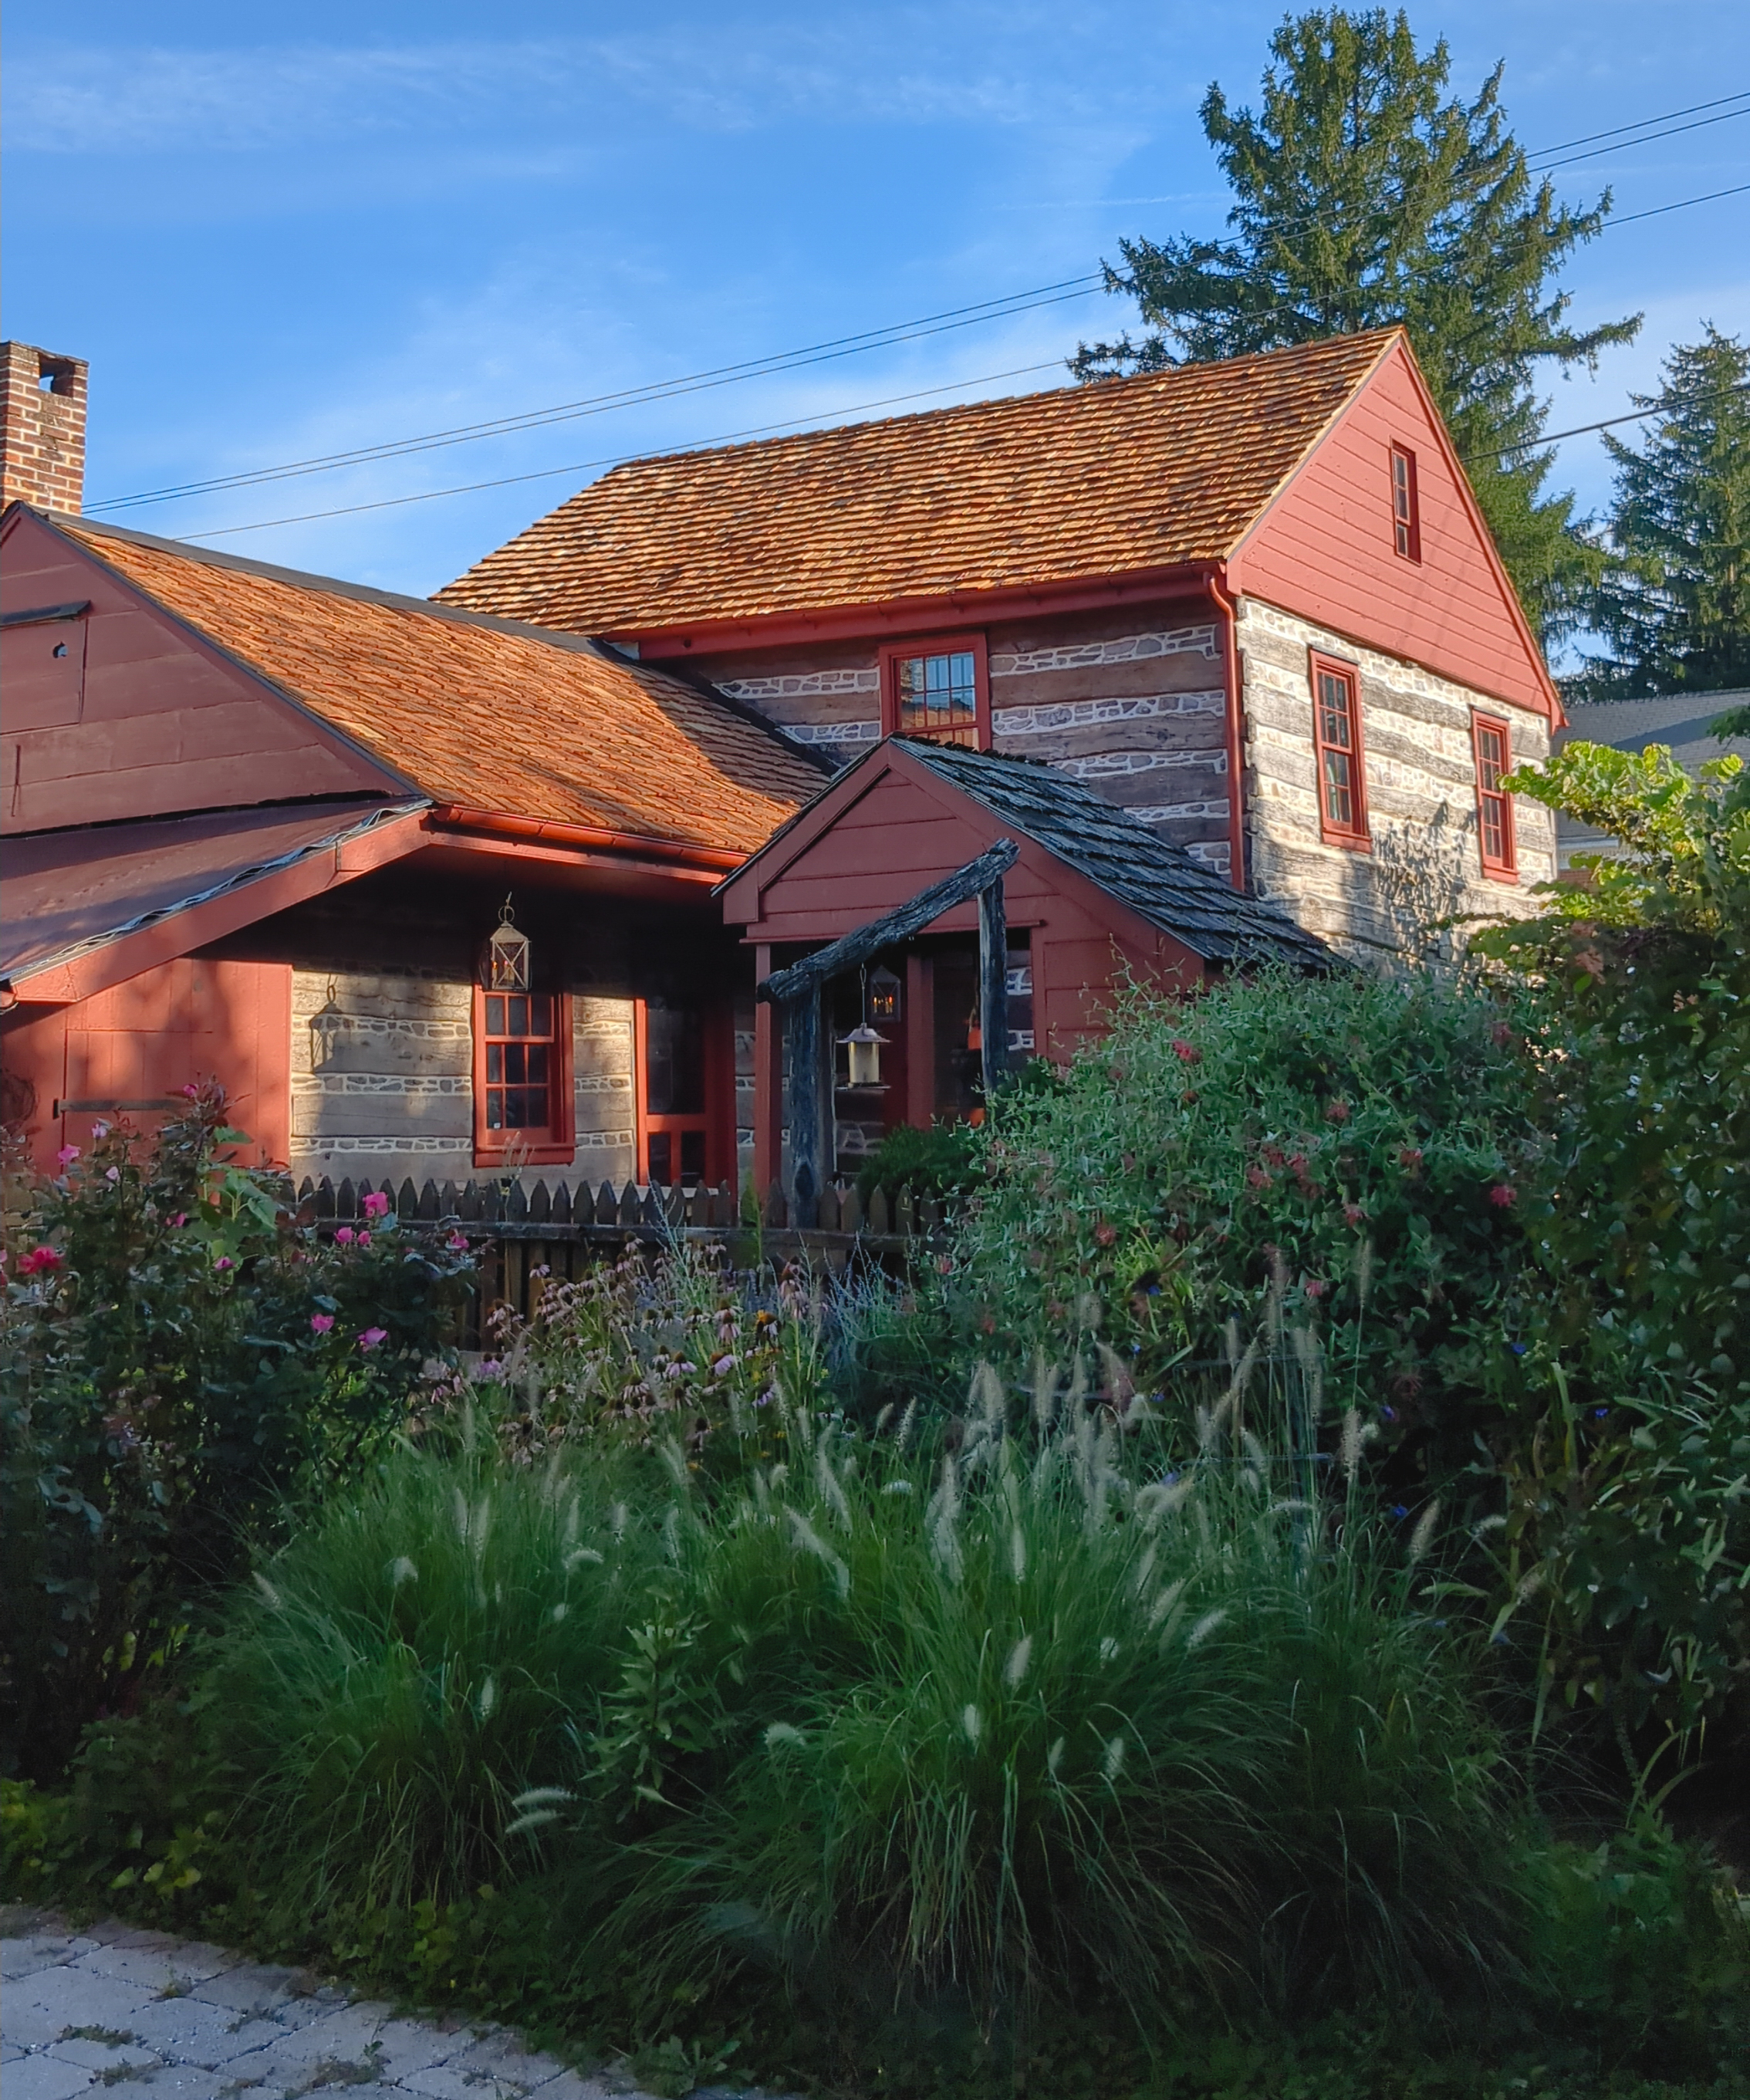
We recently came into possession of an 18th century vernacular German settlement farmhouse.
It was meticulously restored by the previous two owners, with great care put into the historic accuracy of materials.
On purchasing the house, we were well aware that the thirty year-old cedar shake was going to need to be replaced soon.
There were no leaks, but insurance was pushing us to get it replaced within a month of moving in..
We heavily debated what to replace it with.
Wanting to maintain the appearance of the house, we explored the prohibitively expensive synthetic CeDUR product, and the more affordable EcoStar synthetic shake, as well as standing seam metal.
This is ideological
I was reading John Ruskin's The Seven Lamps of Architecture essay at the time, which outlines the foundation for Good architecture.
It made me question the direction I was taking this project in.
The first two points in the essay stuck with me
- Sacrifice – dedication of man's craft to God, as visible proofs of man's love and obedience
- Truth – handcrafted and honest display of materials and structure. Truth to materials and honest display of construction.
I thought about the implications of my choice between modern synthetic materials and natural traditional materials.
It wasn't one purely of aesthetics, but of deciding the fate of the home.
Should this be the preservation of its purity, or will it be its conversion to the modern era?
After much consideration, I decided it would be best to respect the home's history and take the more difficult path of replacing the natural cedar shake.
Finding a contractor
Finding a contractor to do this was hard.
I spoke directly to material suppliers so I had an idea of what a reasonable quote should be.
The couple of contractors that said they would do it, quoted us over 2x what I knew a reasonable price should be.
Most told us they have no knowledge about cedar and to "just put metal on".
I started considering what it would entail to do this project myself, but I soon realized how infeasible that would be especially on the timeline we were on with insurance.
Through researching, I felt I had a deep enough understanding of what a proper install should look like, I just needed a contractor that was willing to work with me and figure it out together.
Finally at the last minute, I found an contractor that was excited to work on a historic home despite not having experience with cedar but willing to learn.
We signed a contract with some timeline contingencies and began ordering materials.
Sourcing Materials
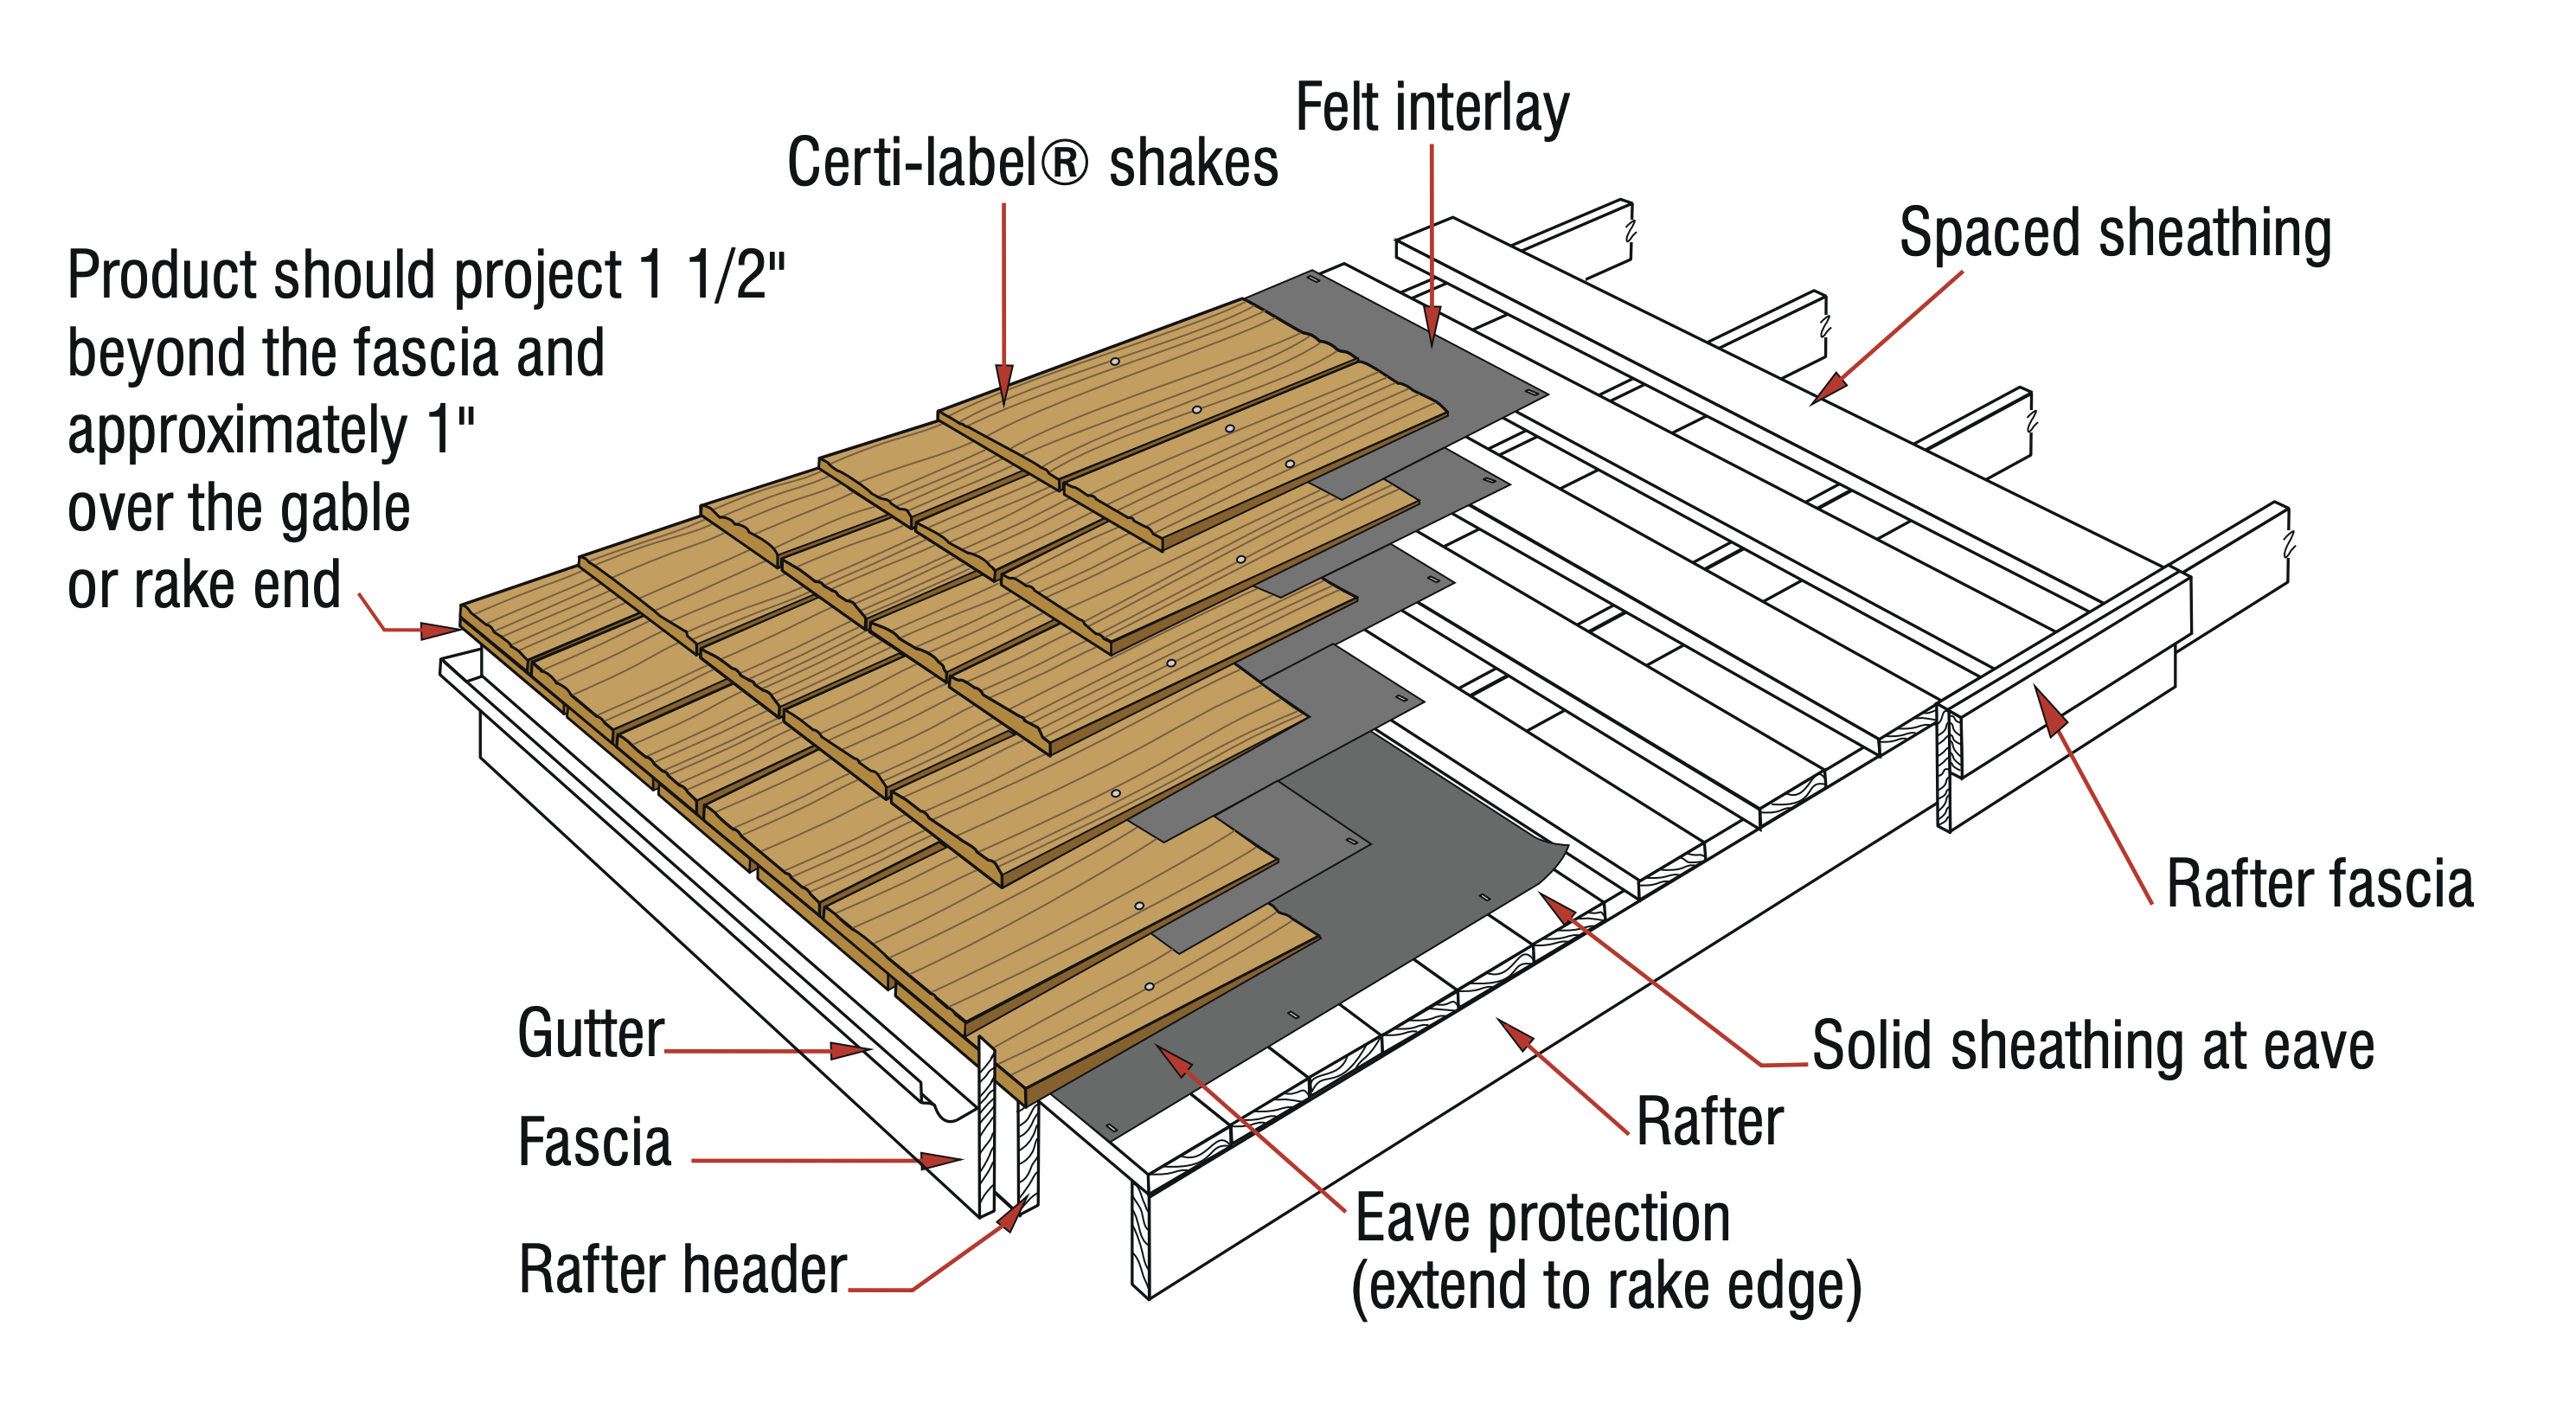
Most of my knowledge on this subject comes from The Cedar Shake and Shingle Bureau Technical Manual. It provides all of the material and installation specifications you could possibly need.
Our roof is about 14 squares (1400 sq. ft.)
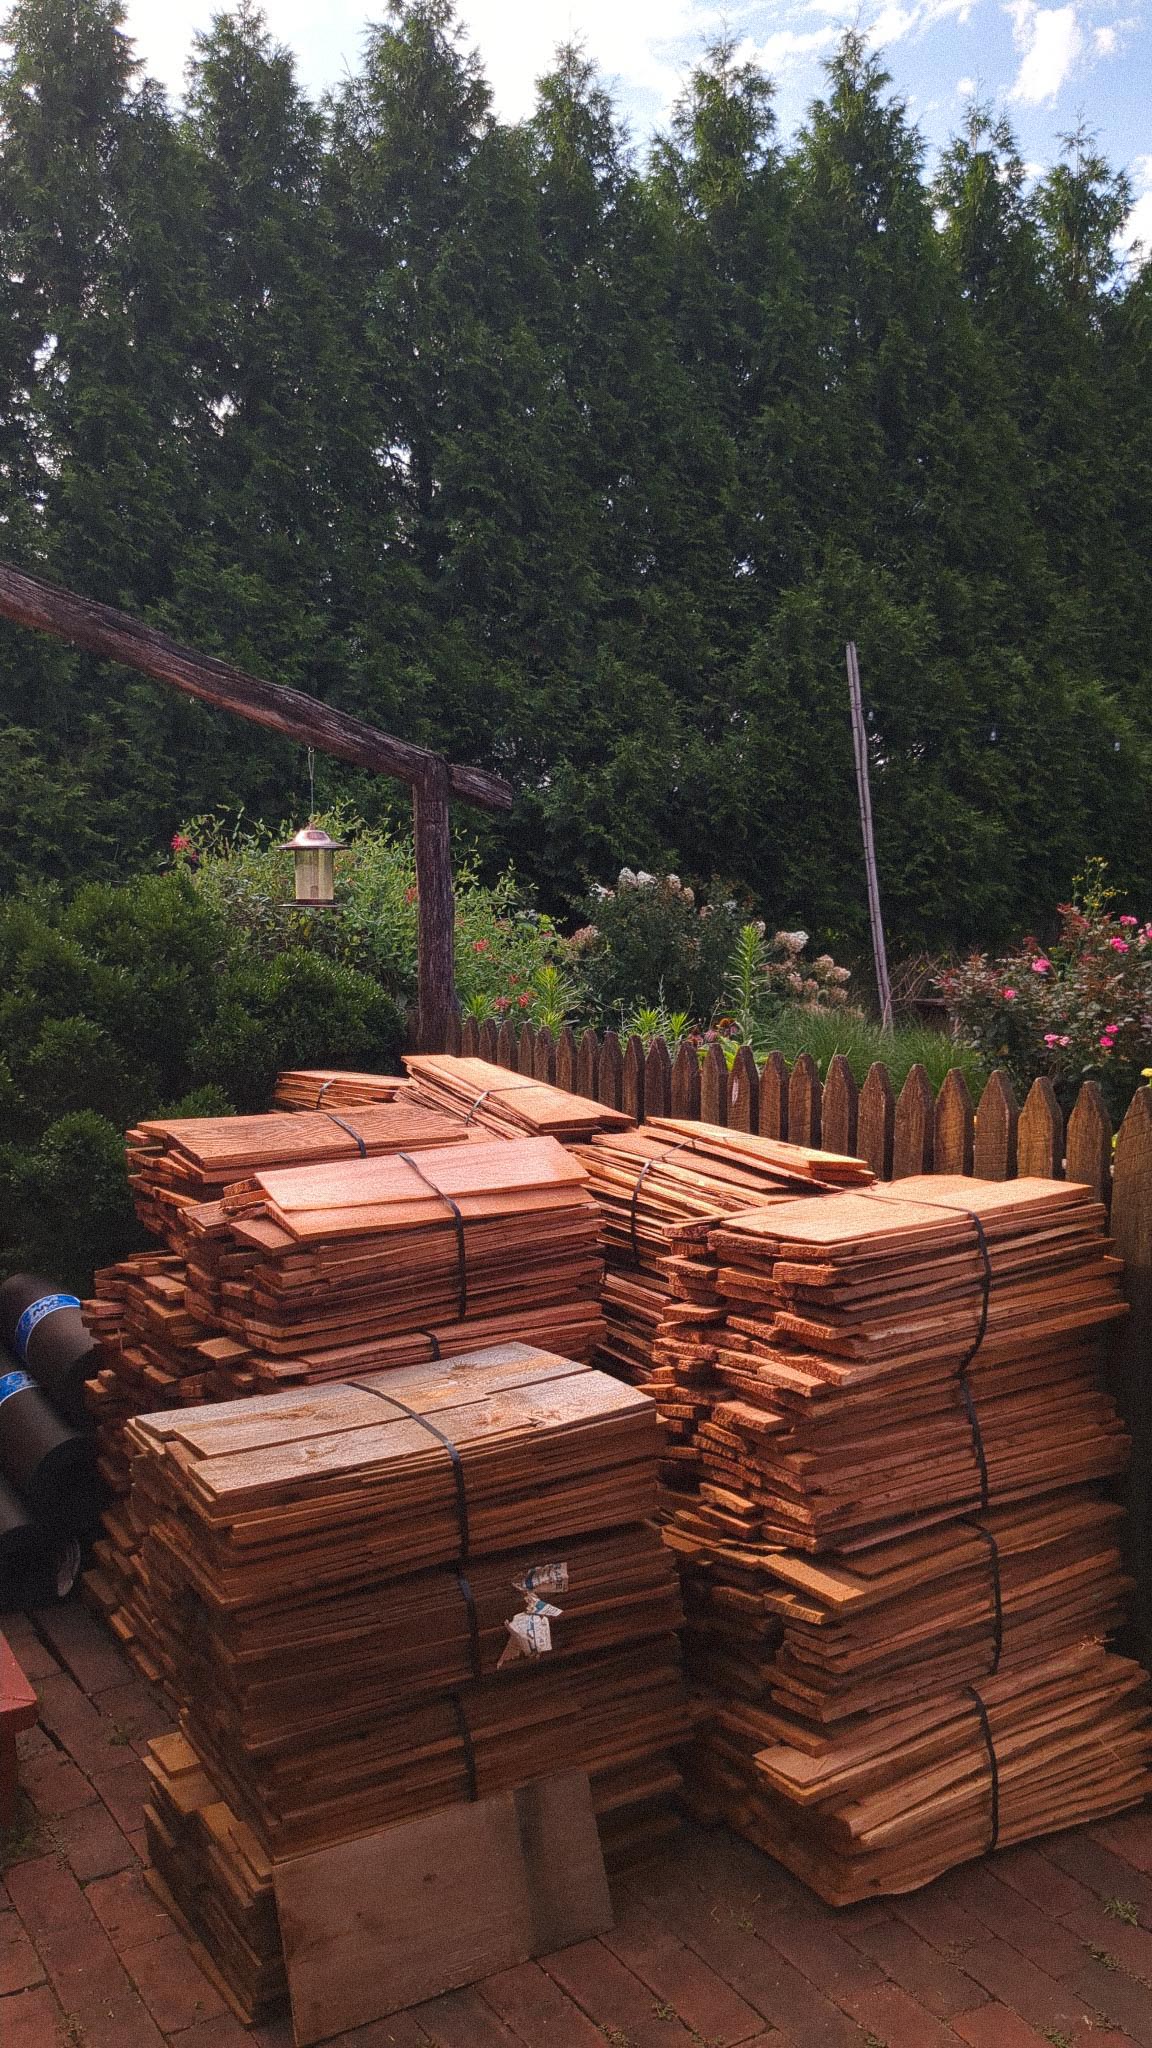
At 7" exposure, 4 bundles covers about 93 sq. ft.
So we ordered 100 bundles of shakes from Twin Creeks, along with Western Red Cedar Hip and Ridge Joints, #30 tar paper, and stainless steel "fasteners" (nails).
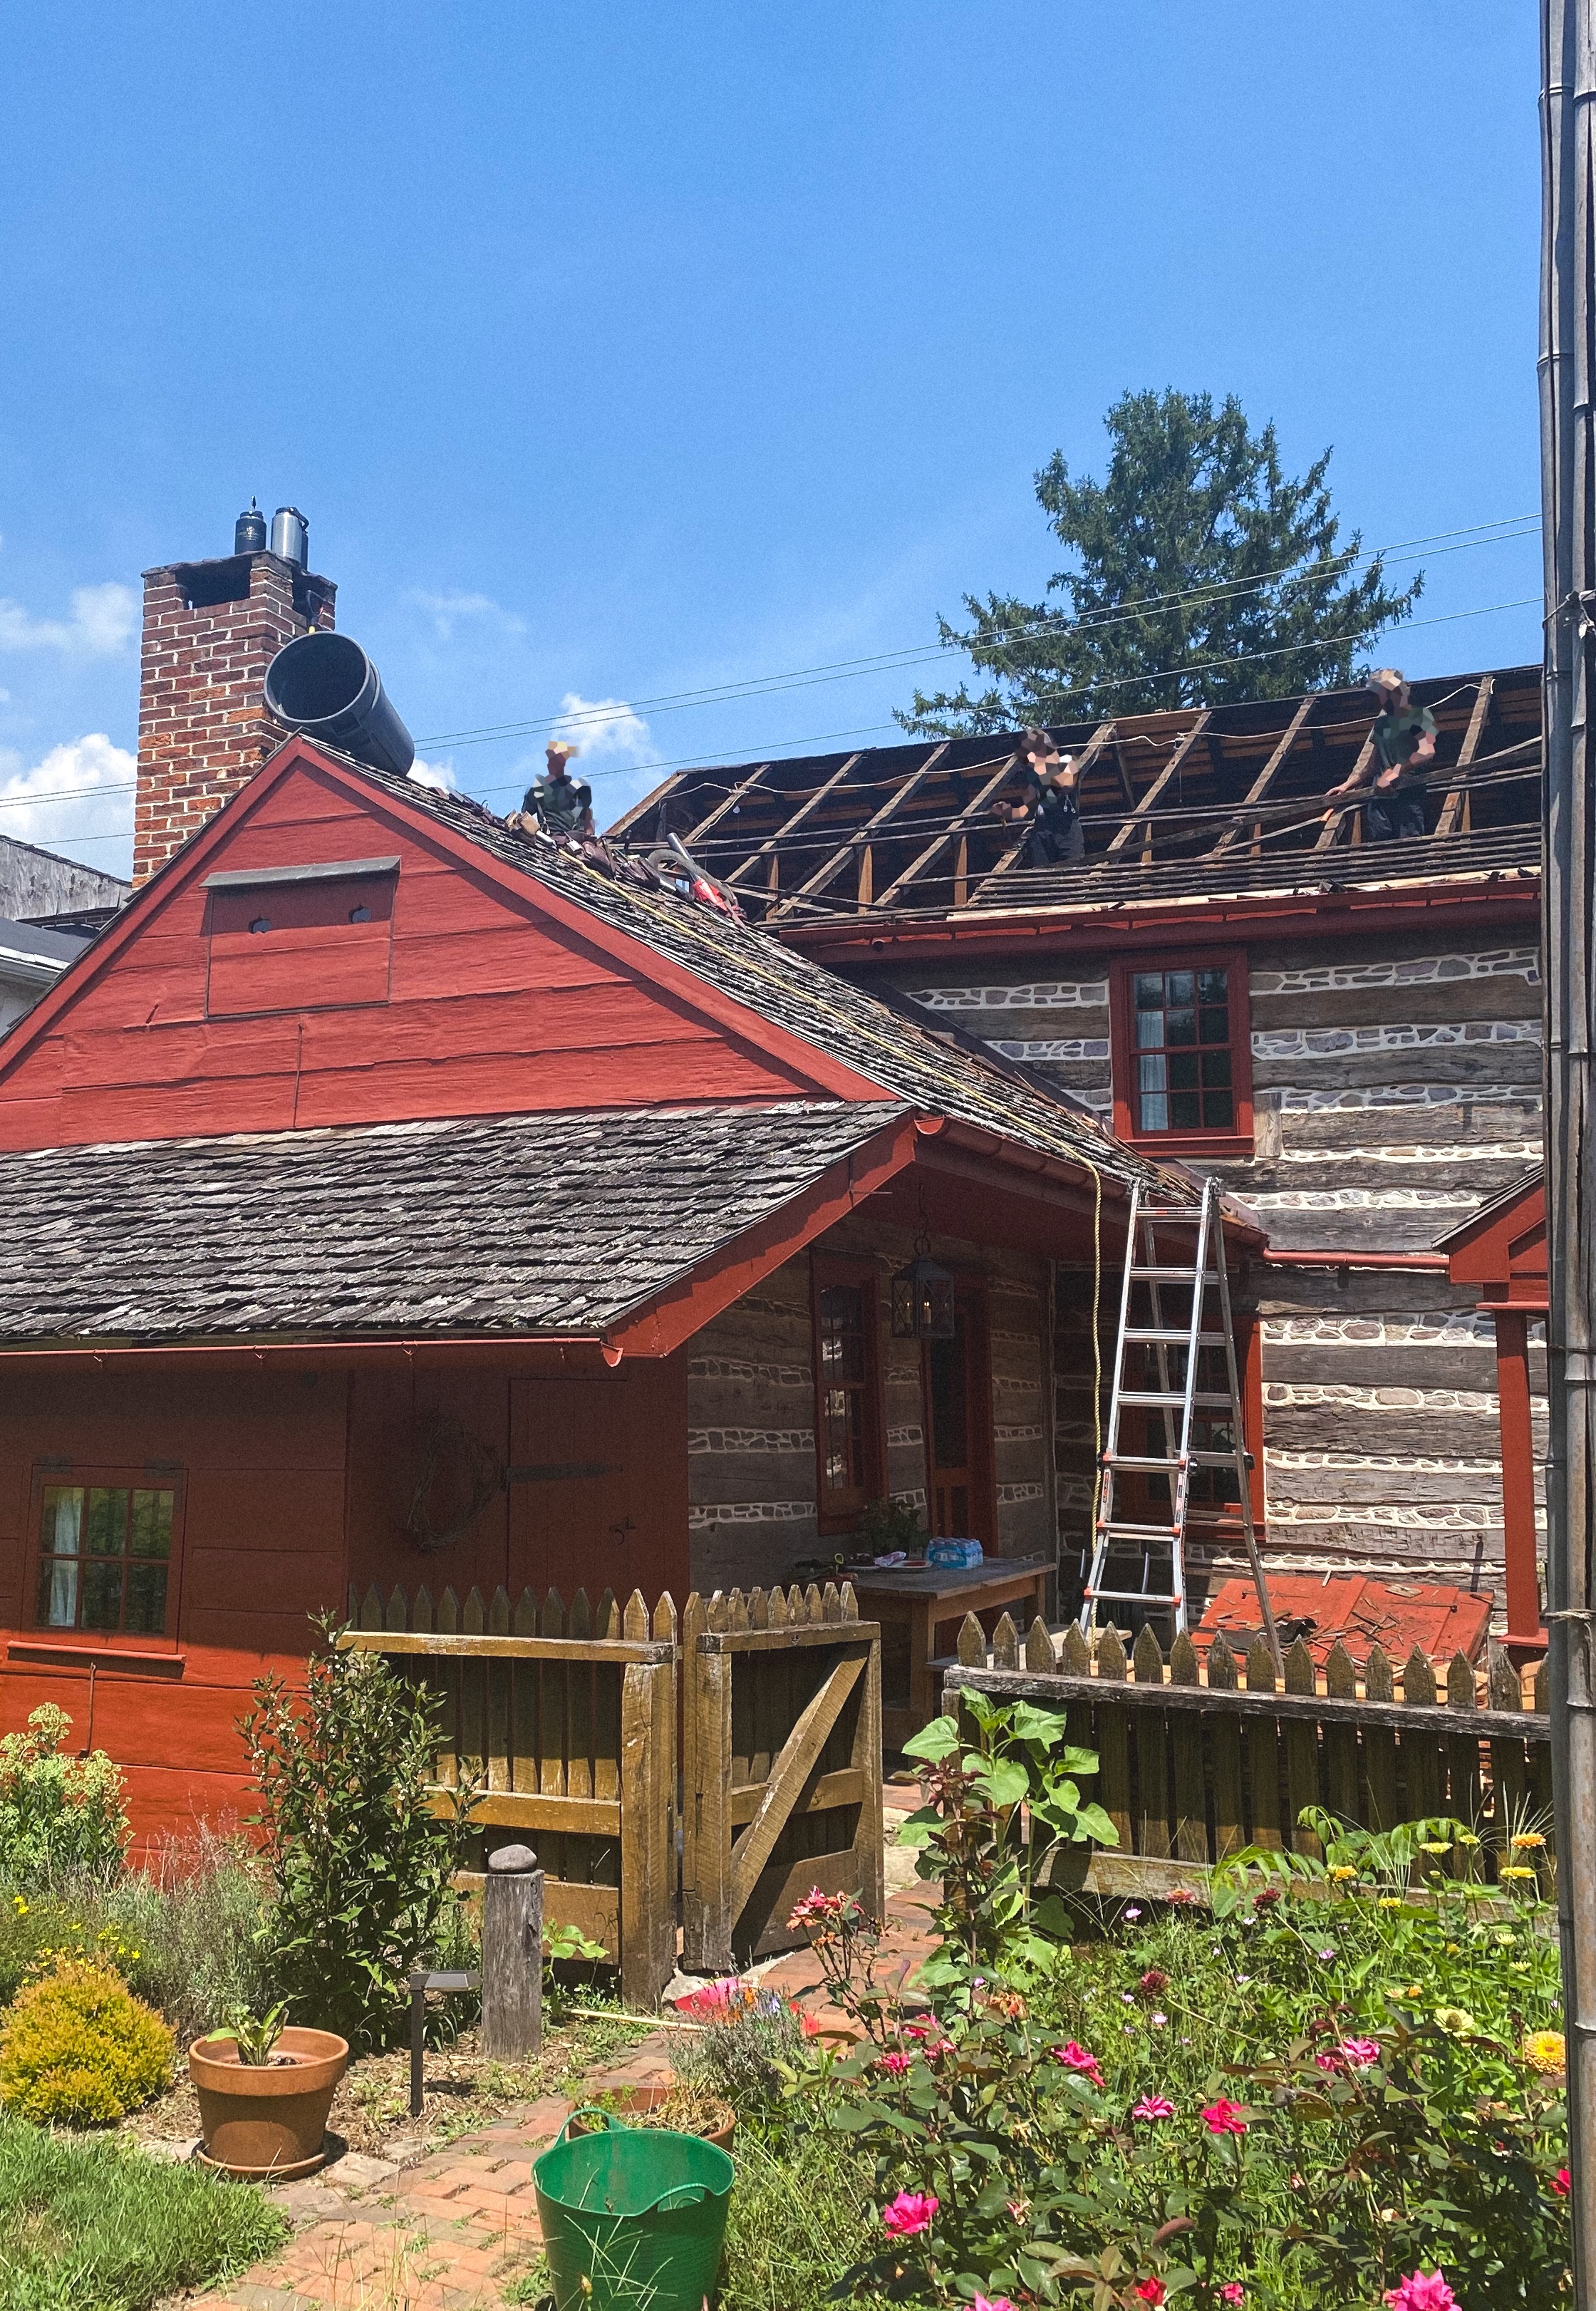
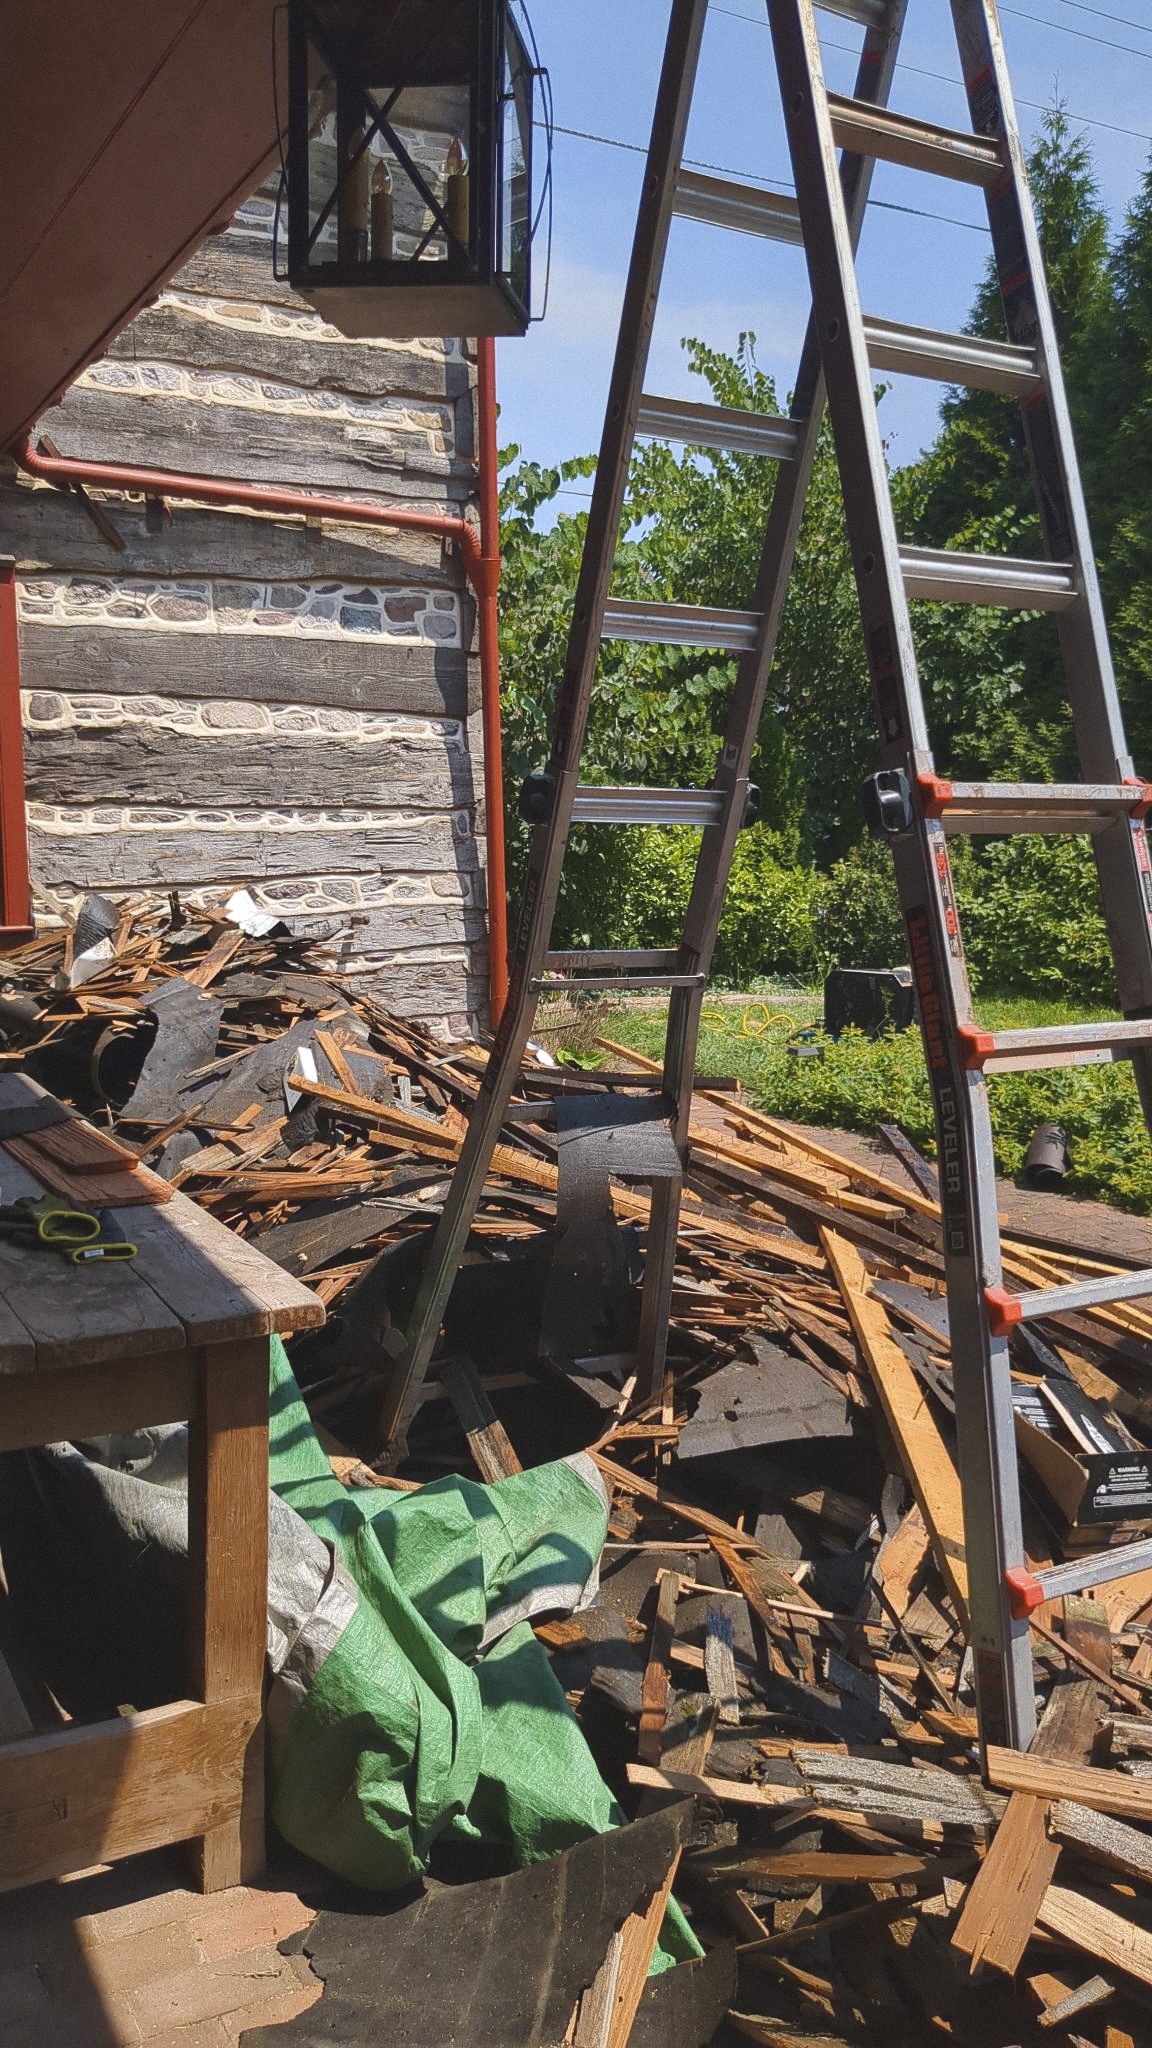
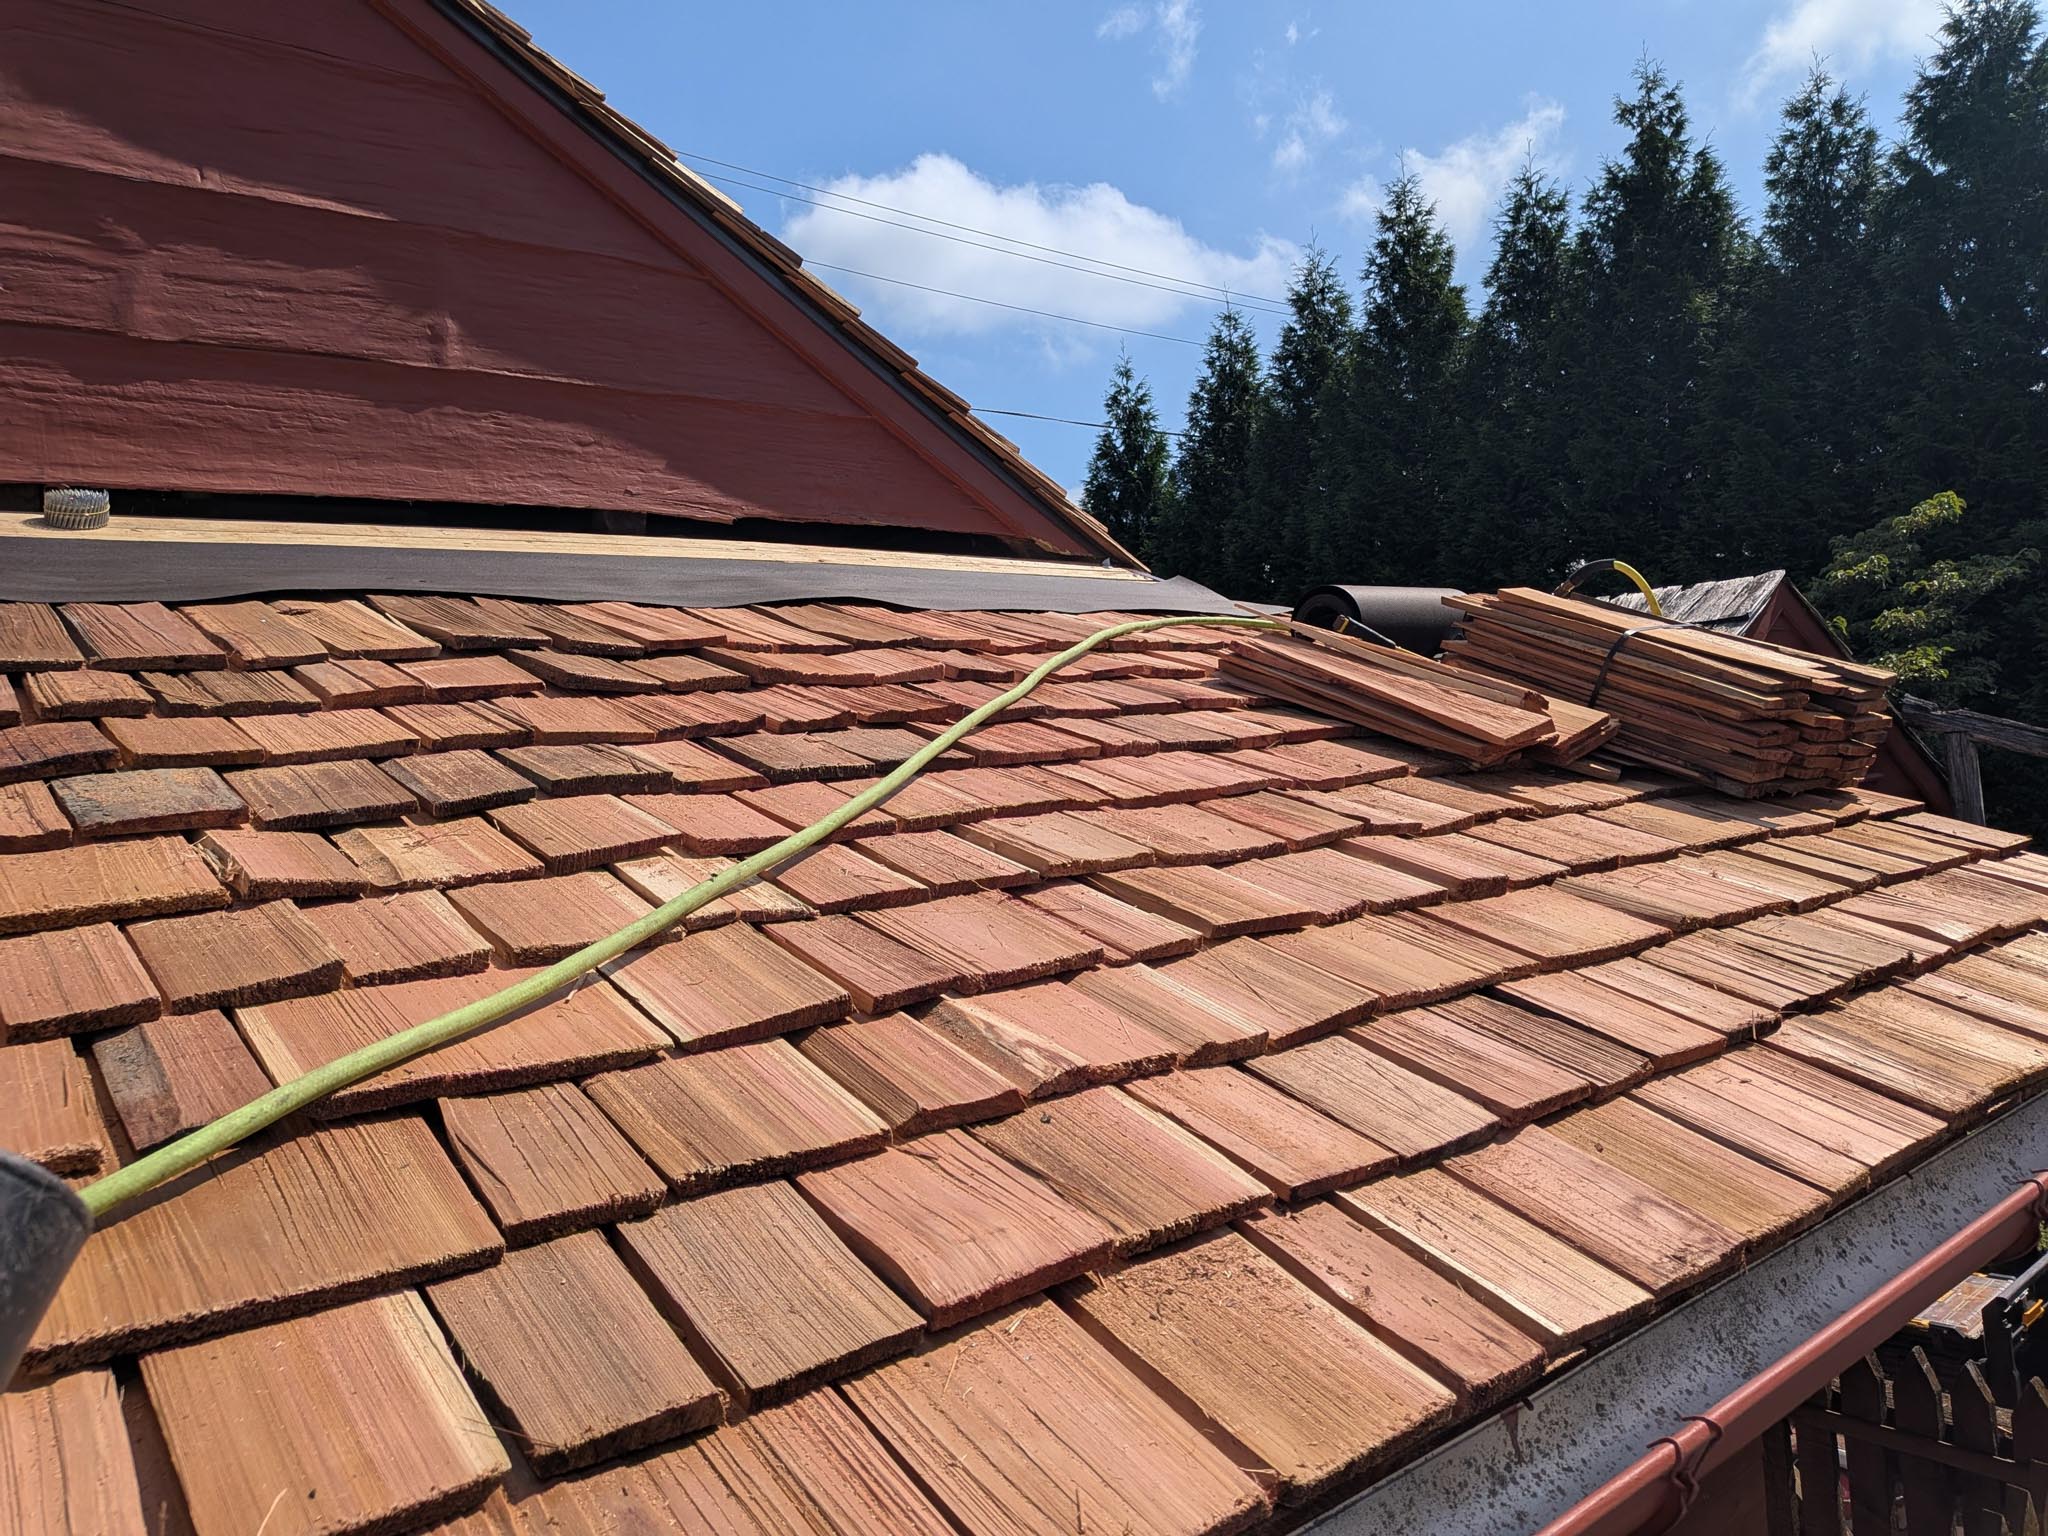
Removal of old shakes
The old shakes came off fairly easily (albeit time-consuming) with the claw end of a hammer.
The purlins were in bad shape, so we made the decision to remove and replace all of them.
The crew worked on one roof face at a time, and left the center purlins in to maintain the structure of the roof while the new 1x4 purlins were laid.
Installation
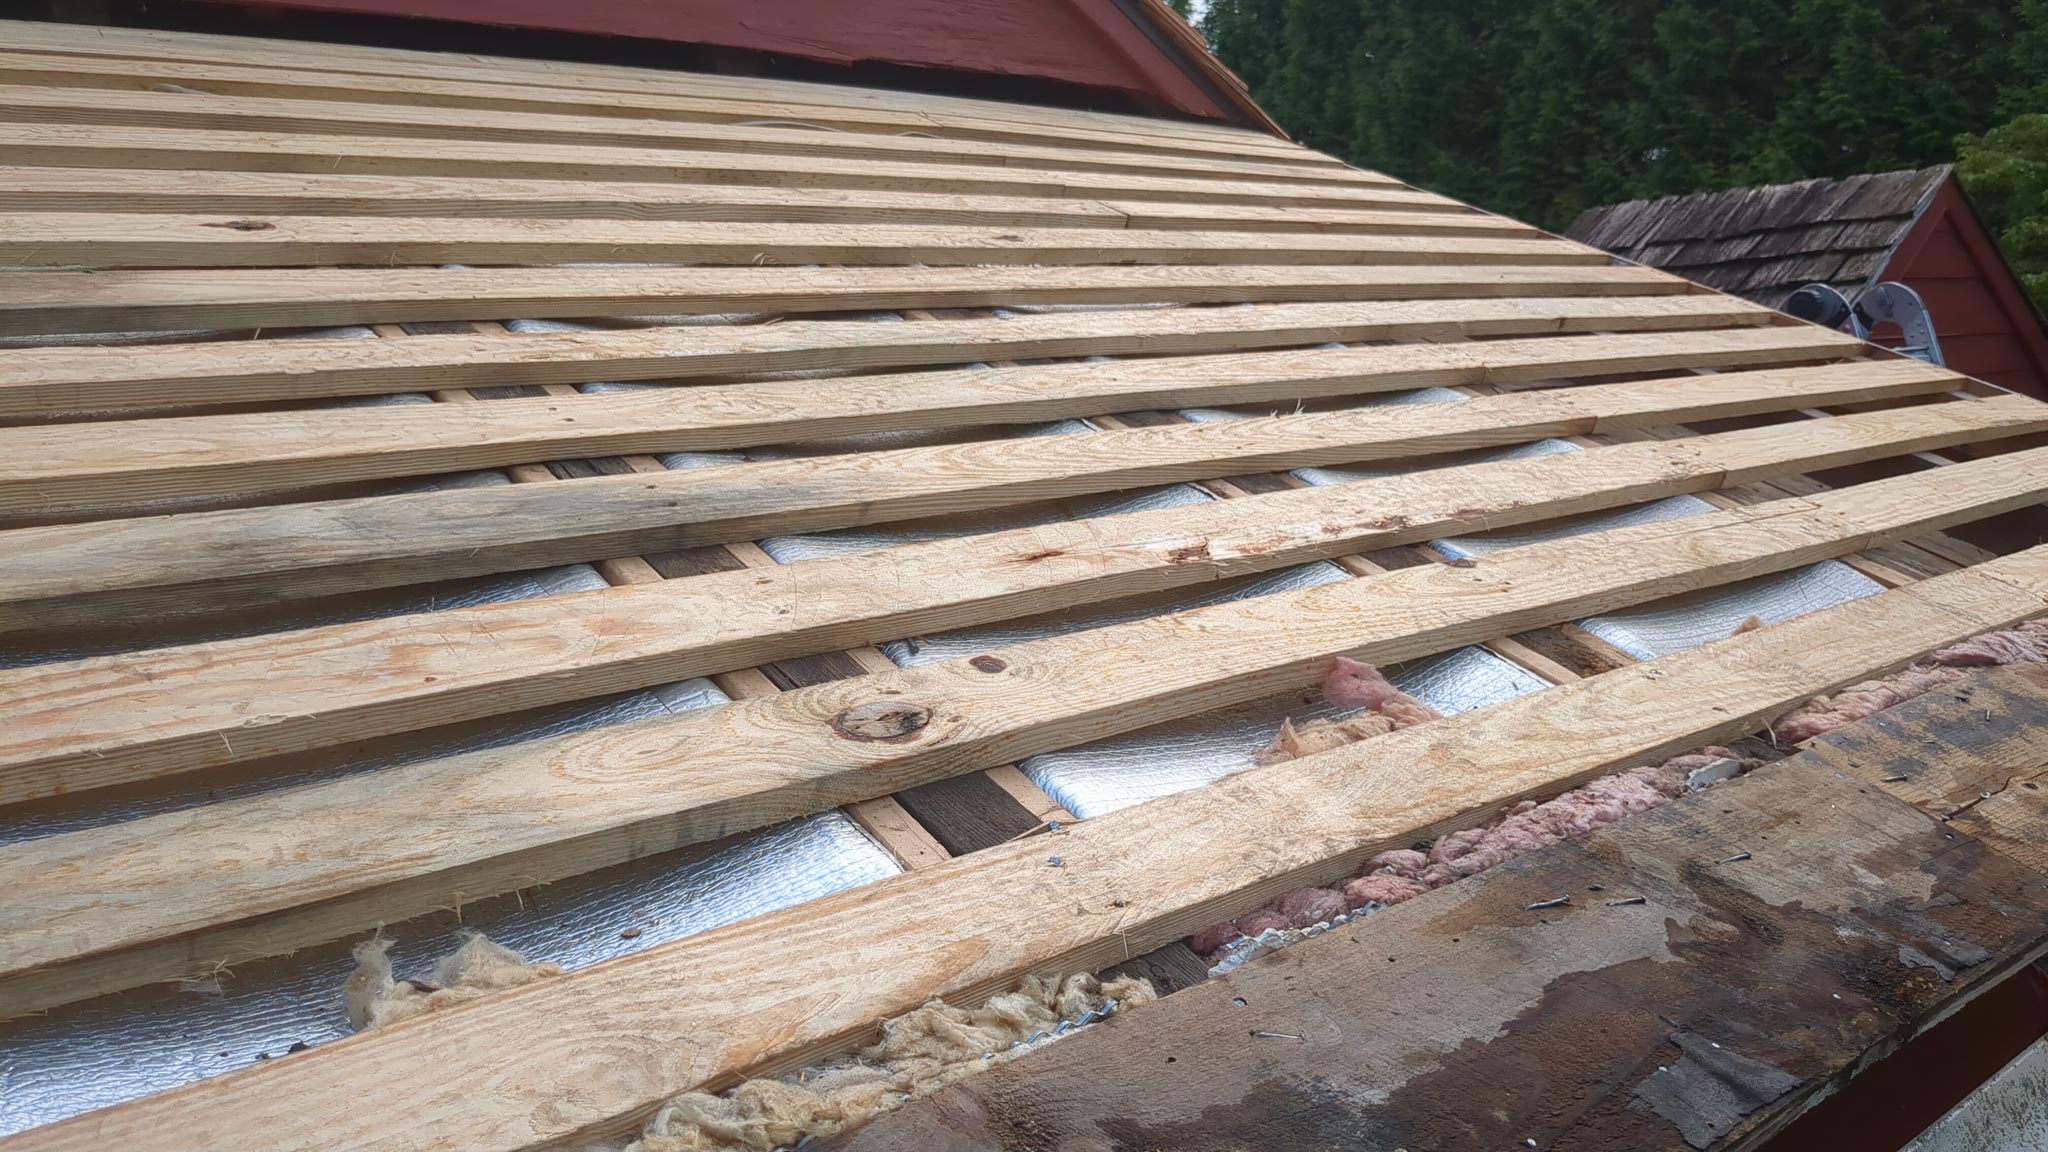
Sheathing
Unlike a traditional roof system, there is no plywood base layer.
On the first day of the project, we briefly vacillated on the type of decking to do.
Until then, I was 100% set on the traditional spaced purlin decking, same as the old roof.
But considering the state of the old purlins, and the convenience of working with solid decking, we entertained just doing standard, solid plywood decking.
Both are acceptable installation methods according to the Cedar Shingle Bureau, but the spaced purlins approach is superior in life expectancy for the shakes
Solid decking would get a breathable membrane on top but spaced purlins provide superior air-flow to let the shakes dry
Remembering how my family's solid deck cedar roof fell apart at the 25 year mark, I decided to stick with the original plan and use spaced purlins.
 Shake installation with felt interlayment (credit: Cedar Bureau)
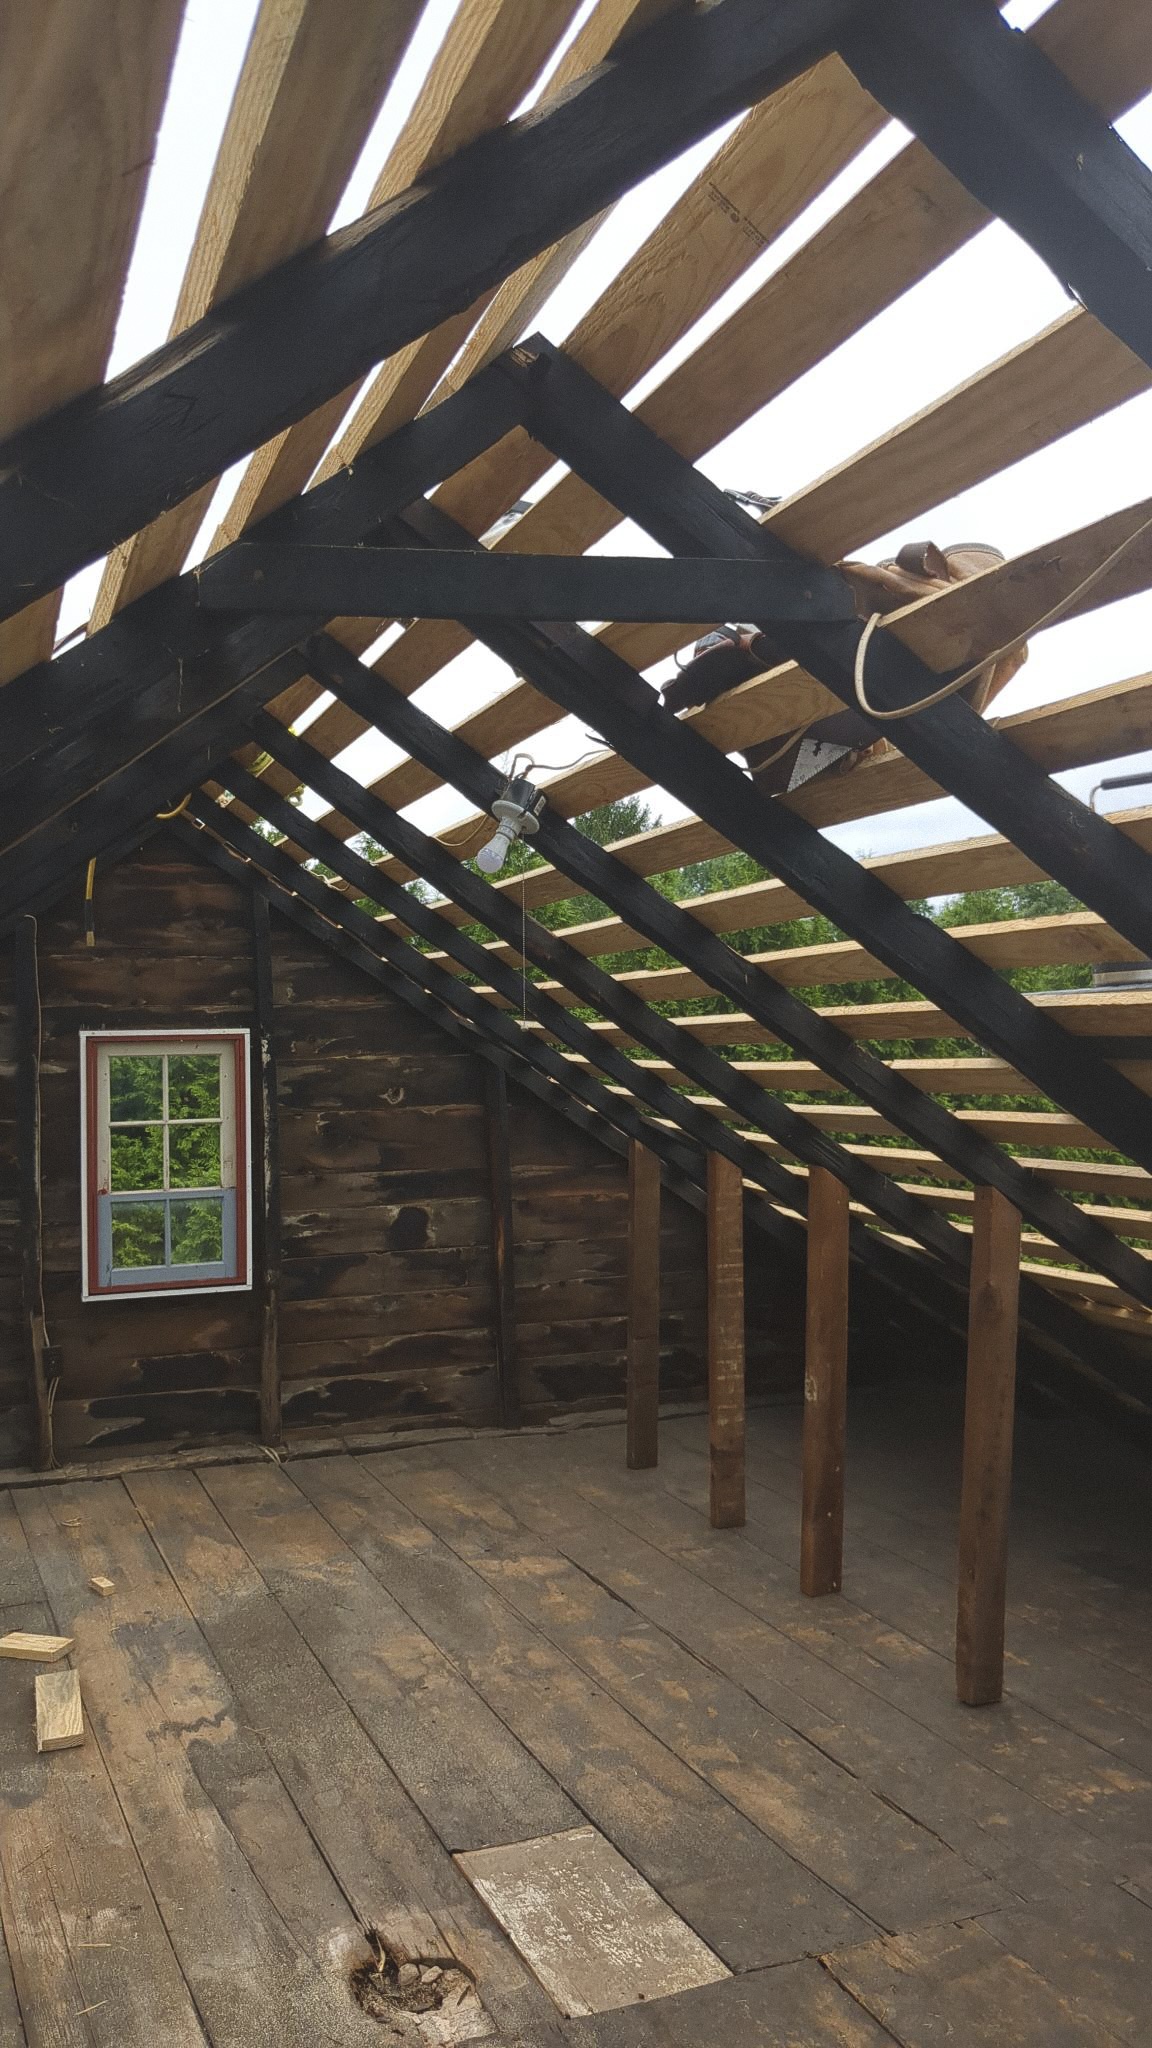 The decking is 1x4 purlins, spaced 7" on center.
This open decking system allows the shakes to breath and dry out from the underside.
The roof is framed with ~36" spaced mortise and tenon rough timber rafters.
There is no ridge beam, no 2x6's, nothing that a modern roof has; hence why we decided against the added weight of sheeting with plywood.
The first set of purlins are 8" on center, but we switched to 7" for the rest.
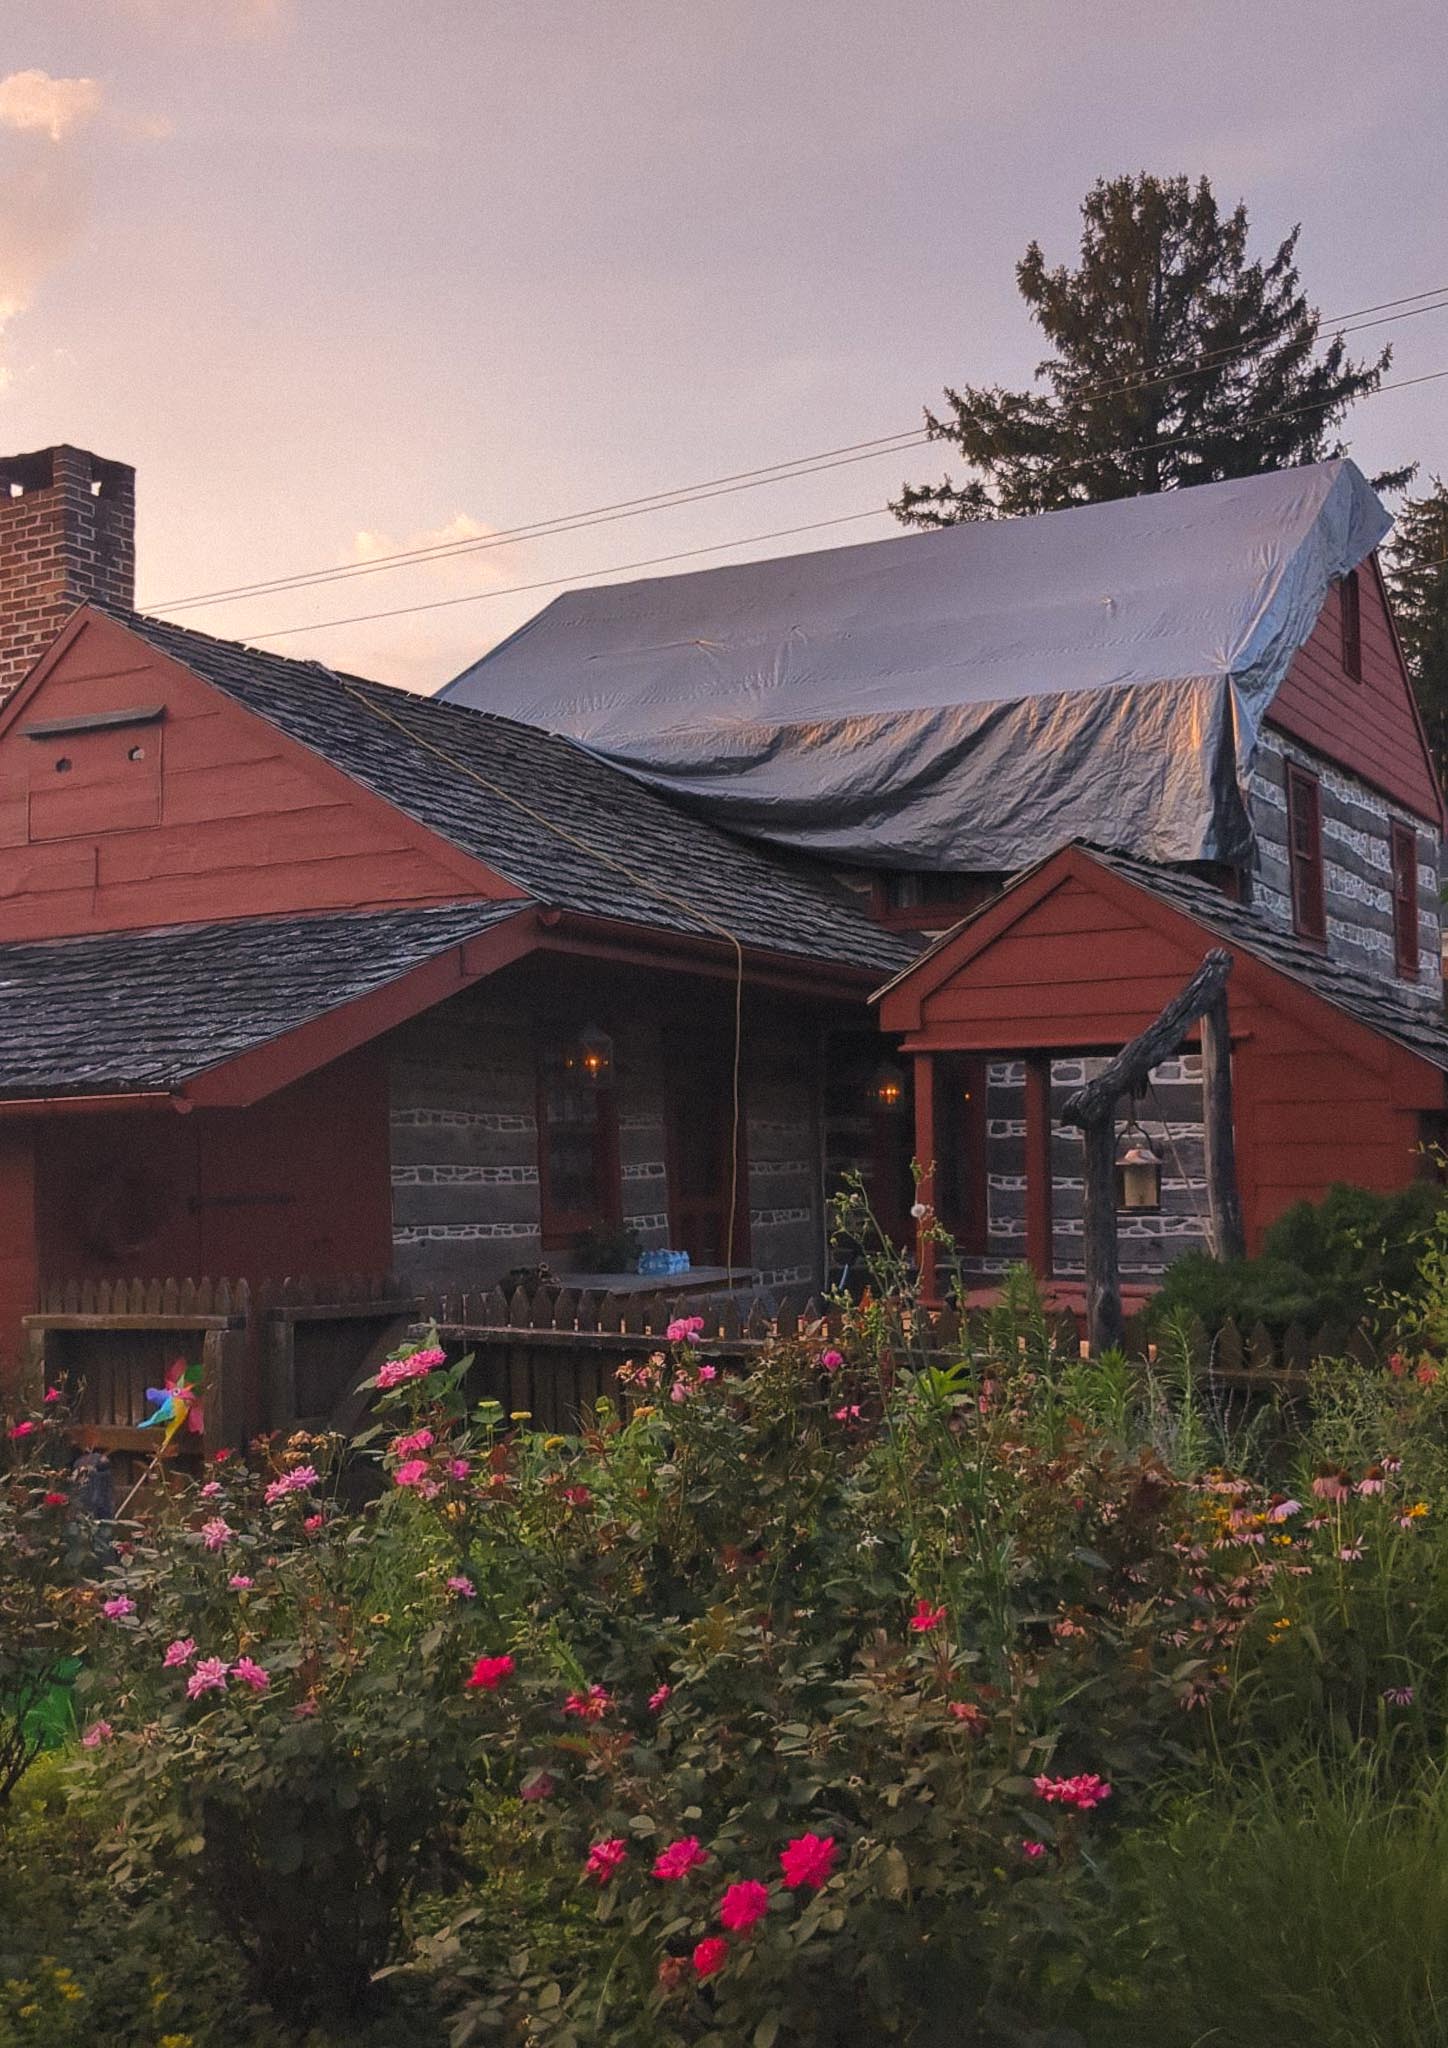 Being that this was going to be a multi-day/multi-week project and there is no waterproofing to hold us over if (when) a storm came, the crew tarped at the end of every day.
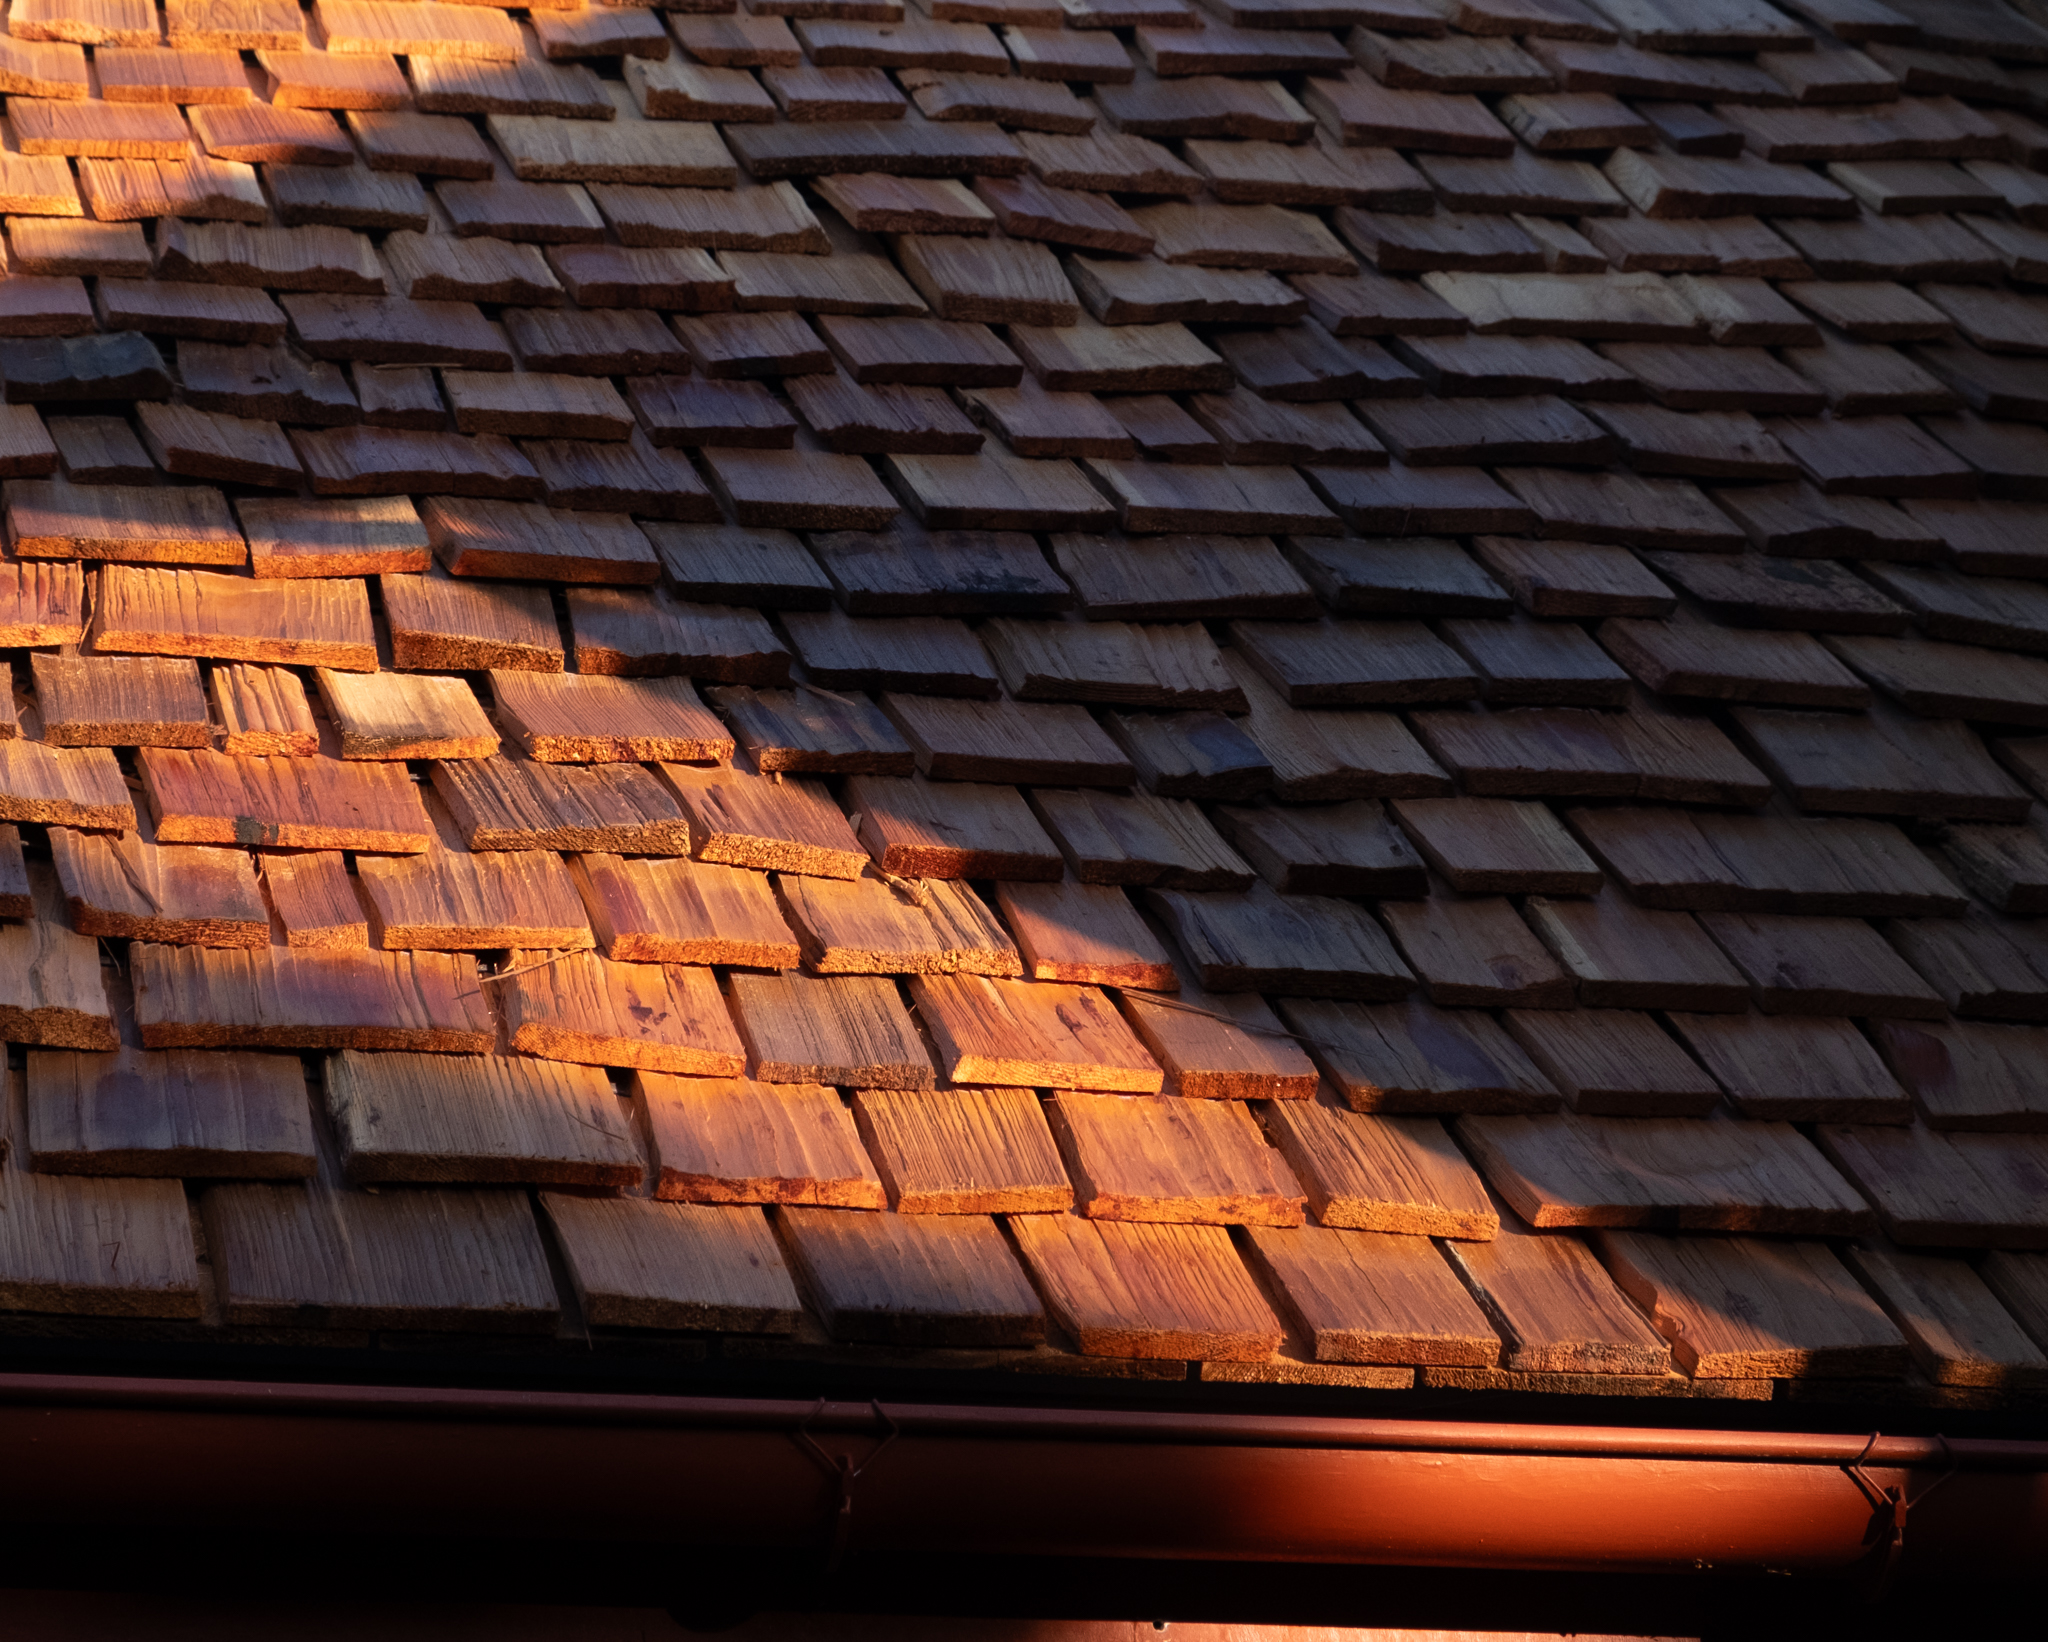
Shakes
This is where we started to make mistakes.
The tough part of this project was wanting to follow the Cedar Bureau spec, while also hoping to use the old roof installation as a guide for what to do.
But the old roof was a mixed bag in regard to spacing, eave protection, etc, yet it lasted 30 years without leaks (granted there is no tree overhang and plenty of southern exposure).
We were constantly questioning ourselves- "well the old roof install did this, but the spec doesn't agree".
Because of this, we made the fatal mistake of tar felt too low and nail pattern too high
We started off our shake rows with 12" felt, laid the felt 8" over the butt, and nailed at 12".
This is completely wrong and we'll likely see premature cupping and staining on this roof section
After five rows, I asked the crew to switch to 18" felt instead, but we continued to use the incorrect tar felt coverage and nailing pattern for this main section of the roof.
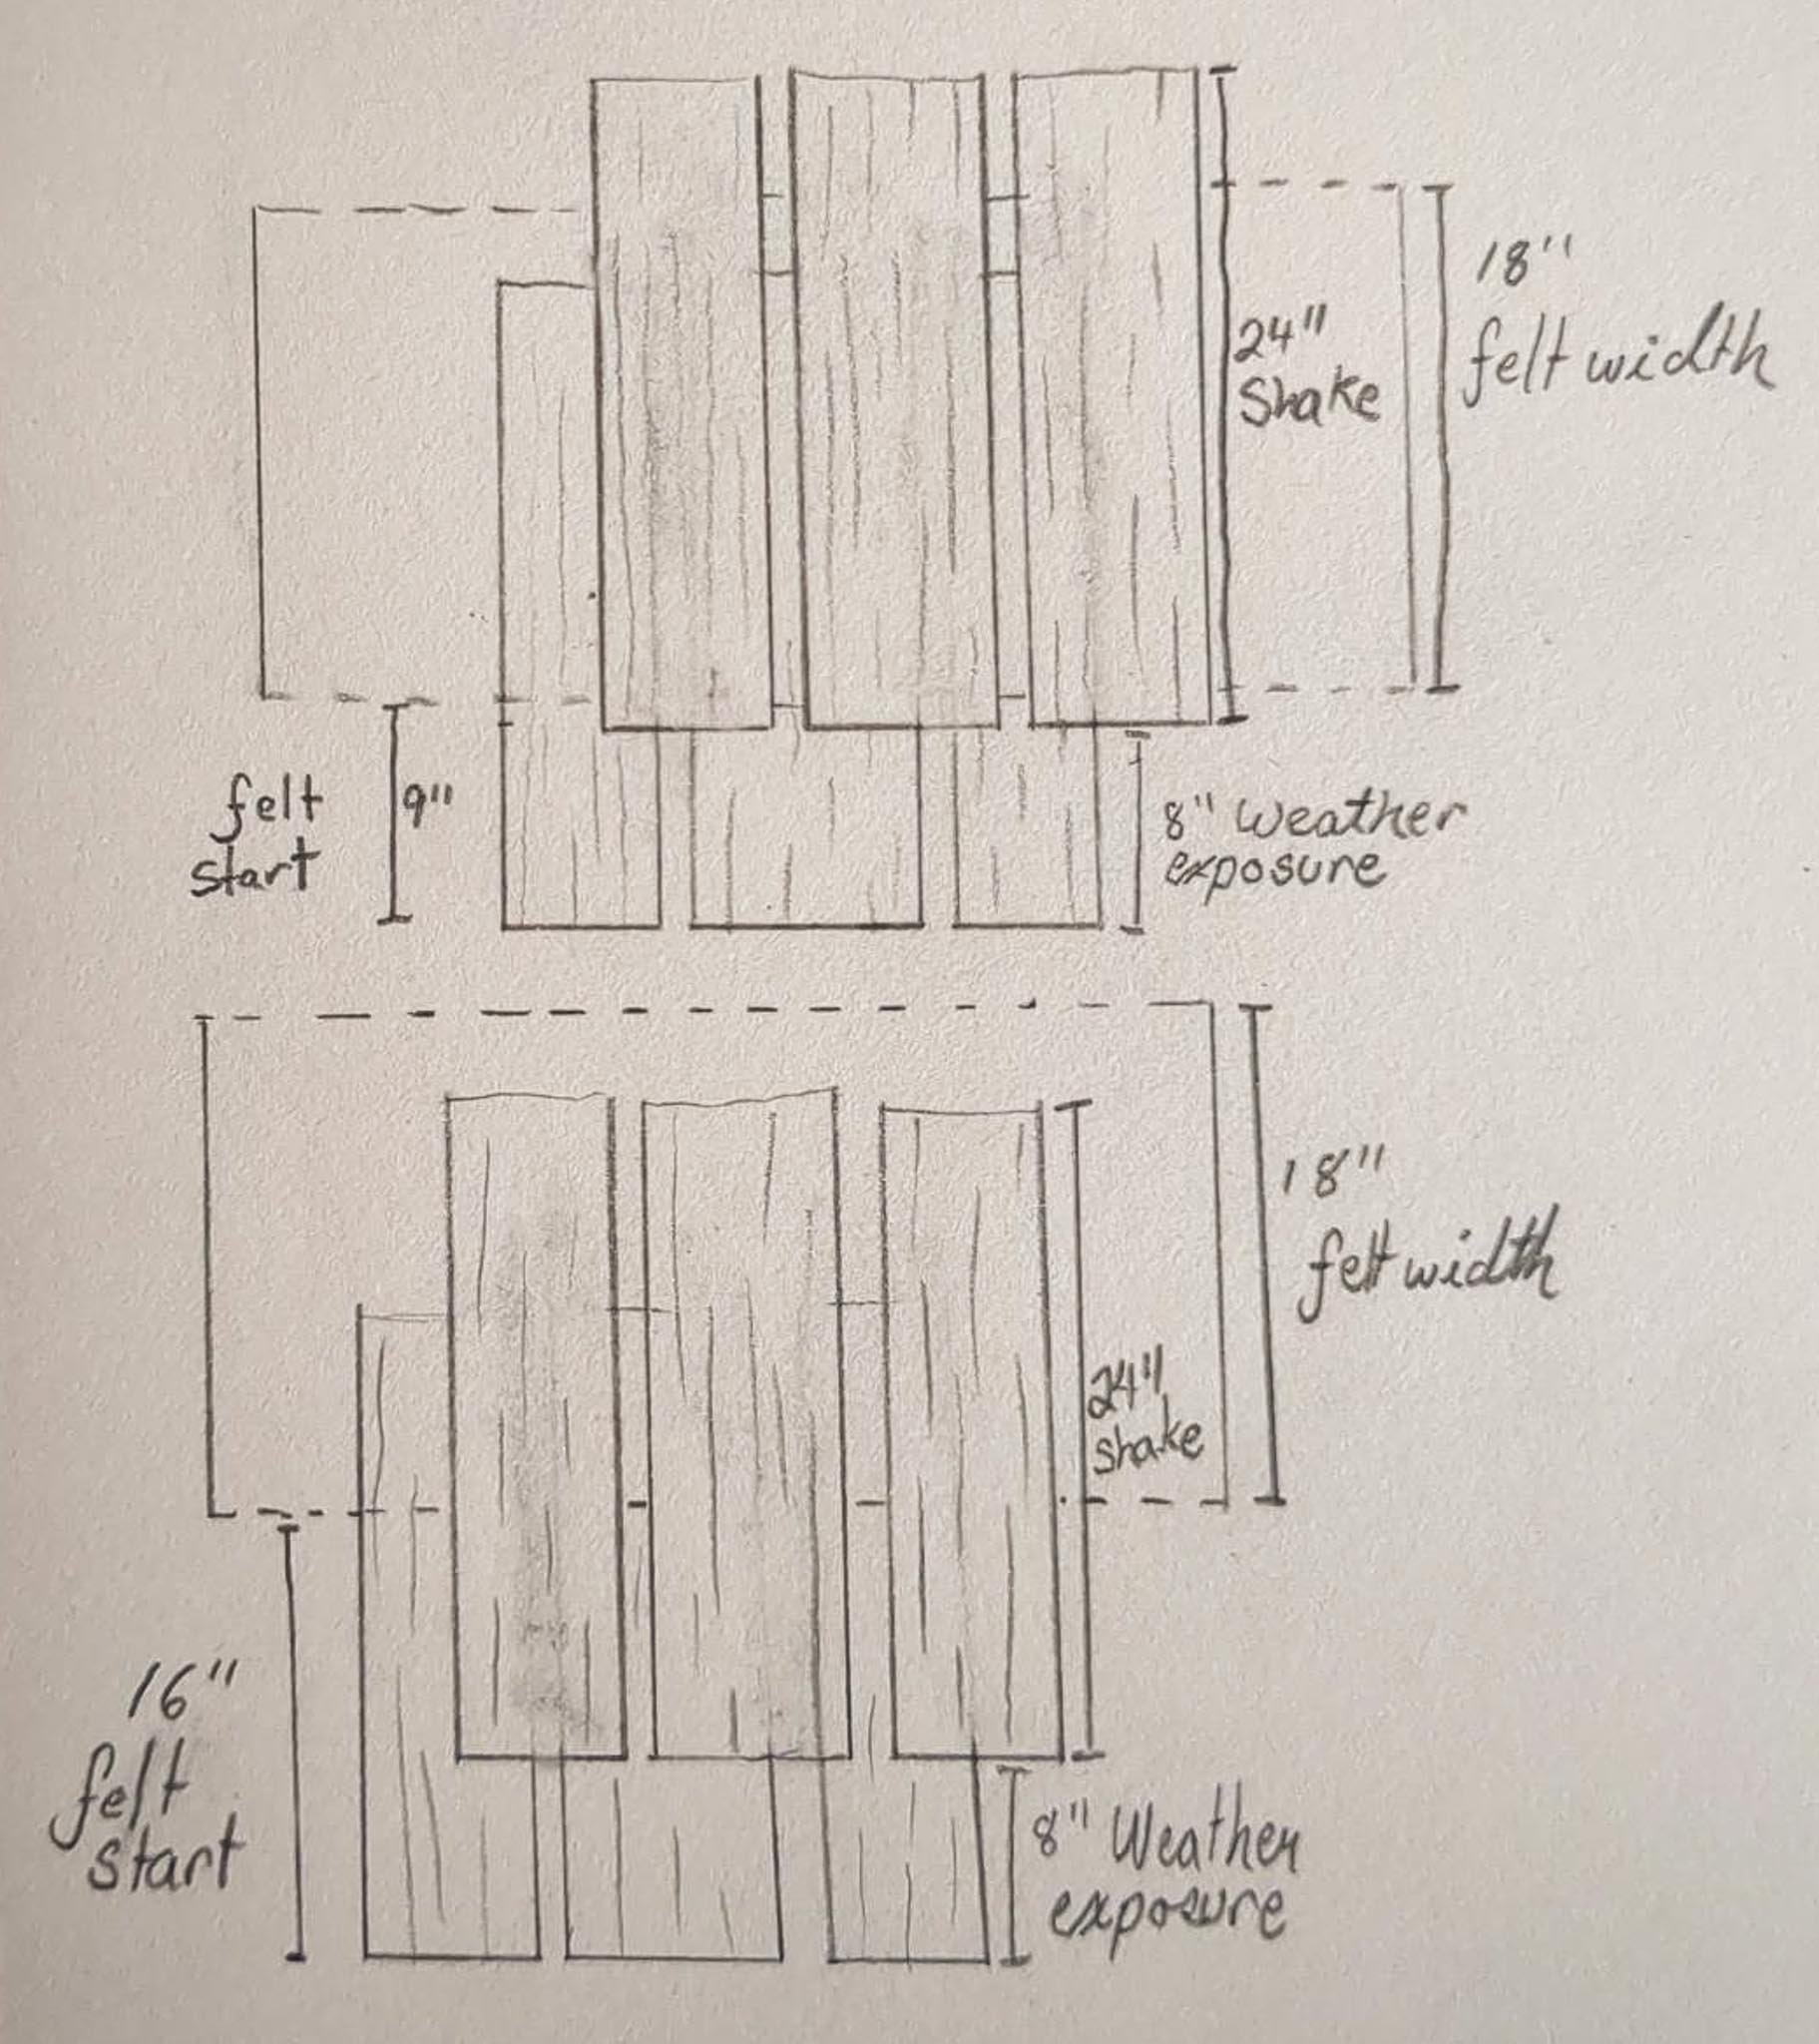 Top illustration is what we did, bottom is how it should have been
I spent that weekend trying to decide how to proceed.
Tearing off and restarting wasn't in the material or time budget.
Water-tightness isn't an issue, it's mainly one of longevity/ lifespan.
We just had to finish the main roof as-is, and do the rear sections correctly.
Ridge
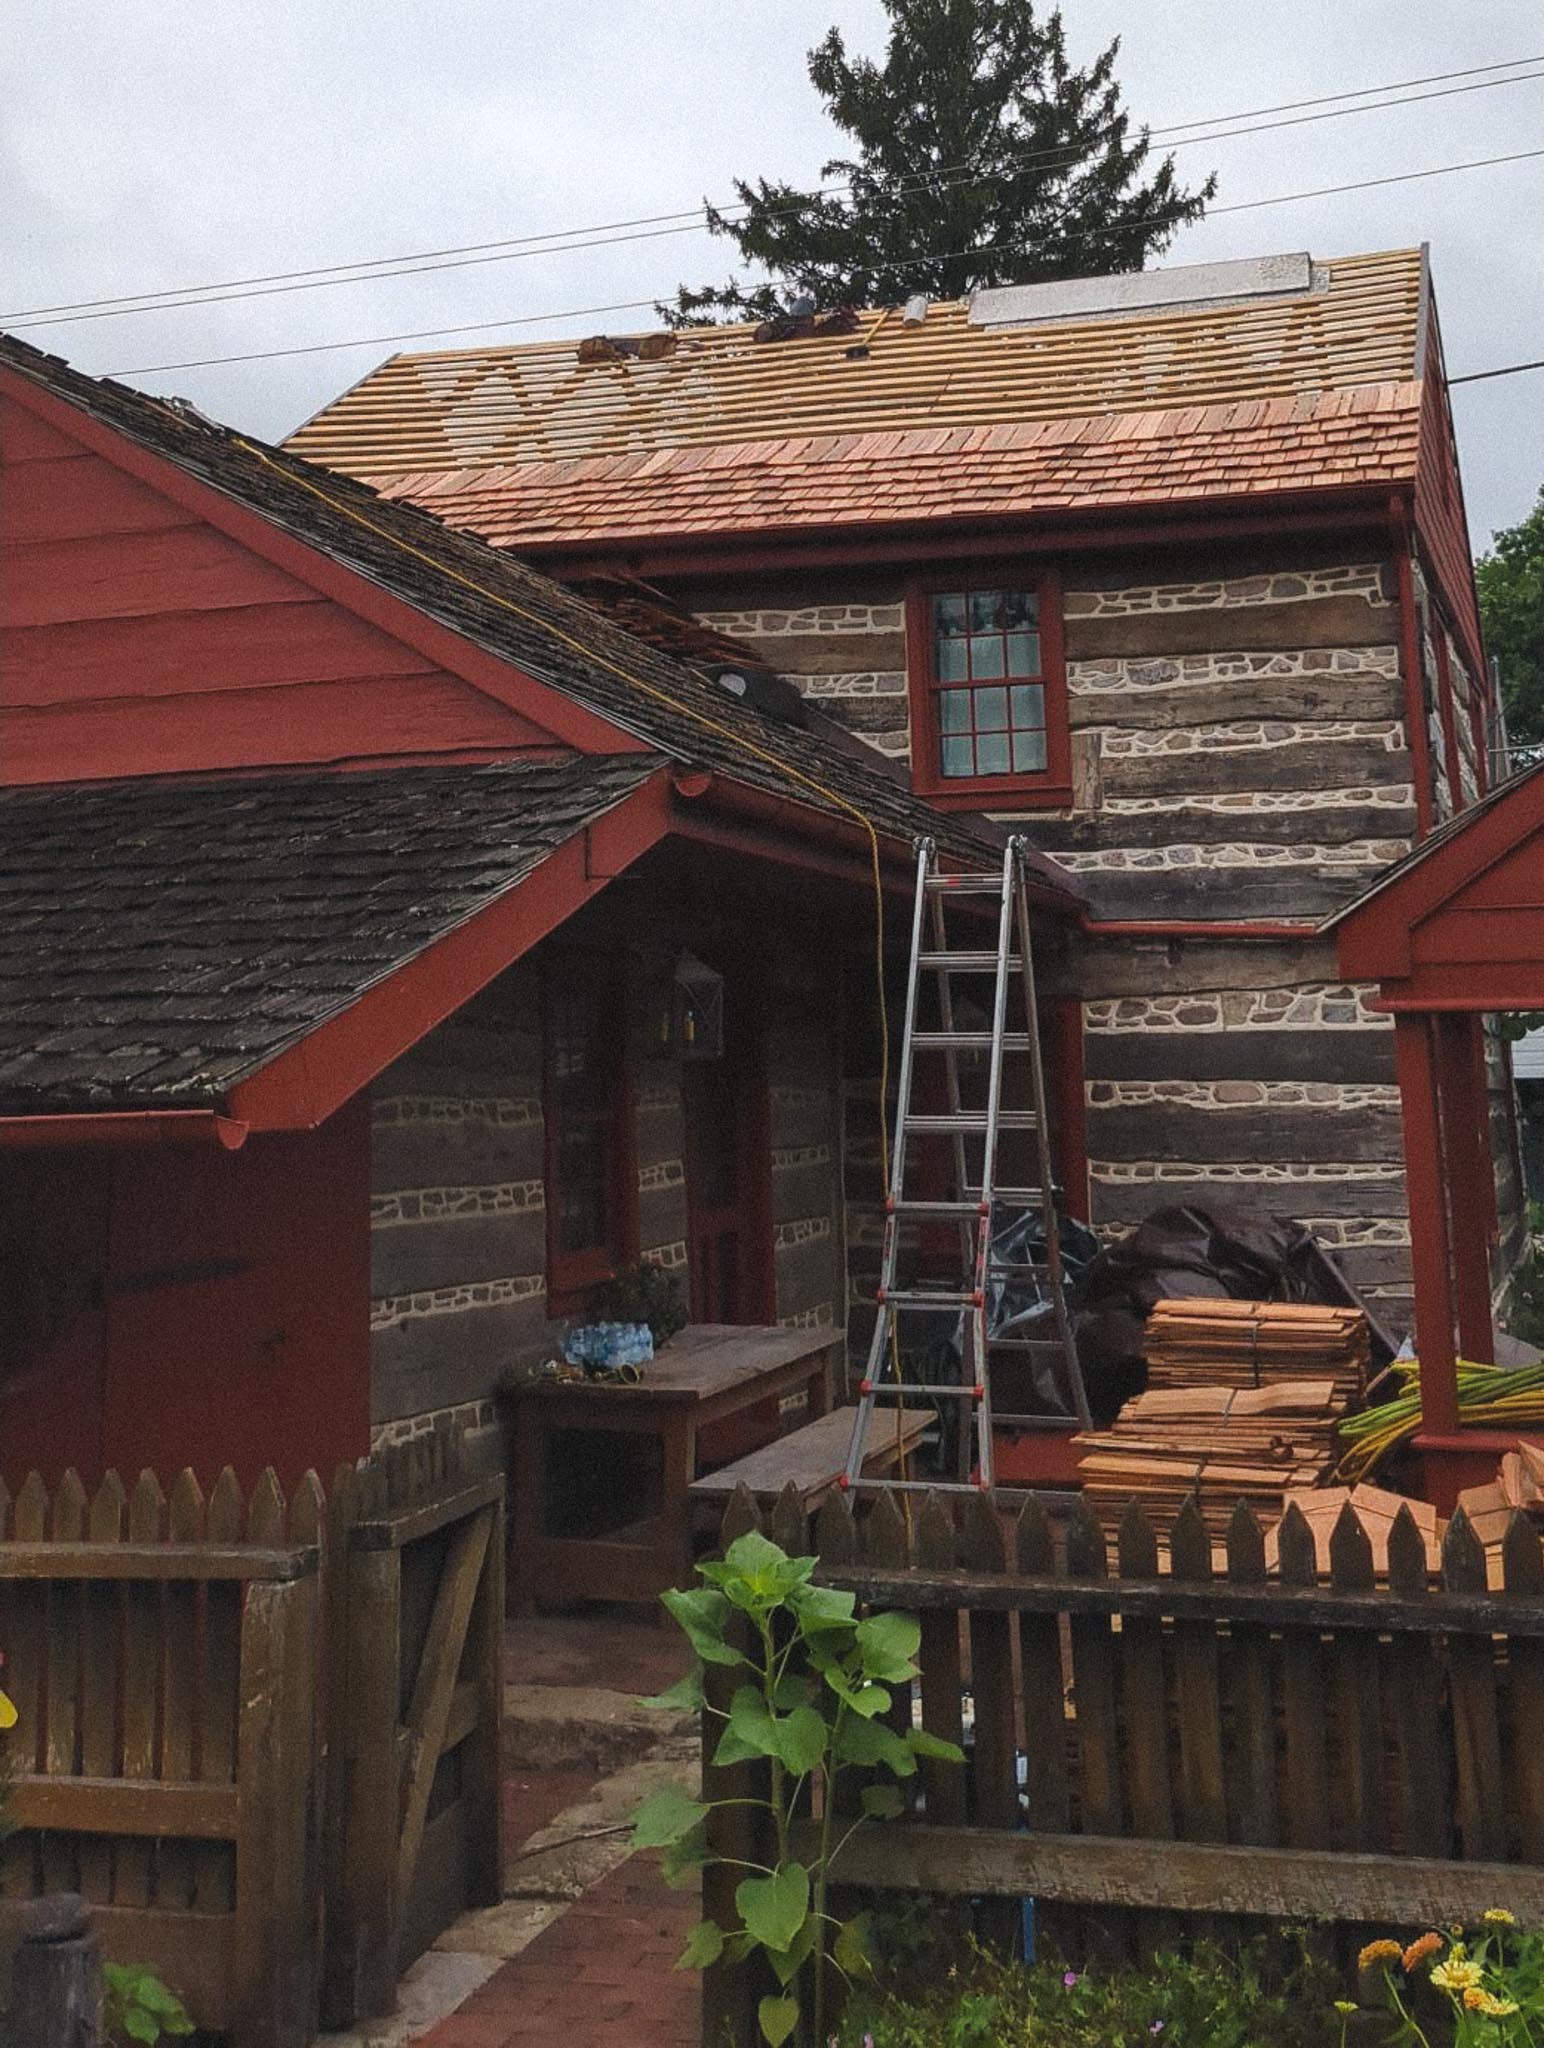
The original roof had the traditional overlap ridge, but being that I couldn't find any information about how this should be done, we opted for cedar ridge caps.
The ridge gets tar felt folded over it and then, because my crew specializes in metal roofs, they added a metal coil ridge, then the cedar ridge caps on top of that.
This was outside of my purview/ research and entrusted these decisions to the crew.
More shakes, done correctly
Once we got to the rear sections of the roof, we were feeling much more confident about understanding the cedar bureau spec.
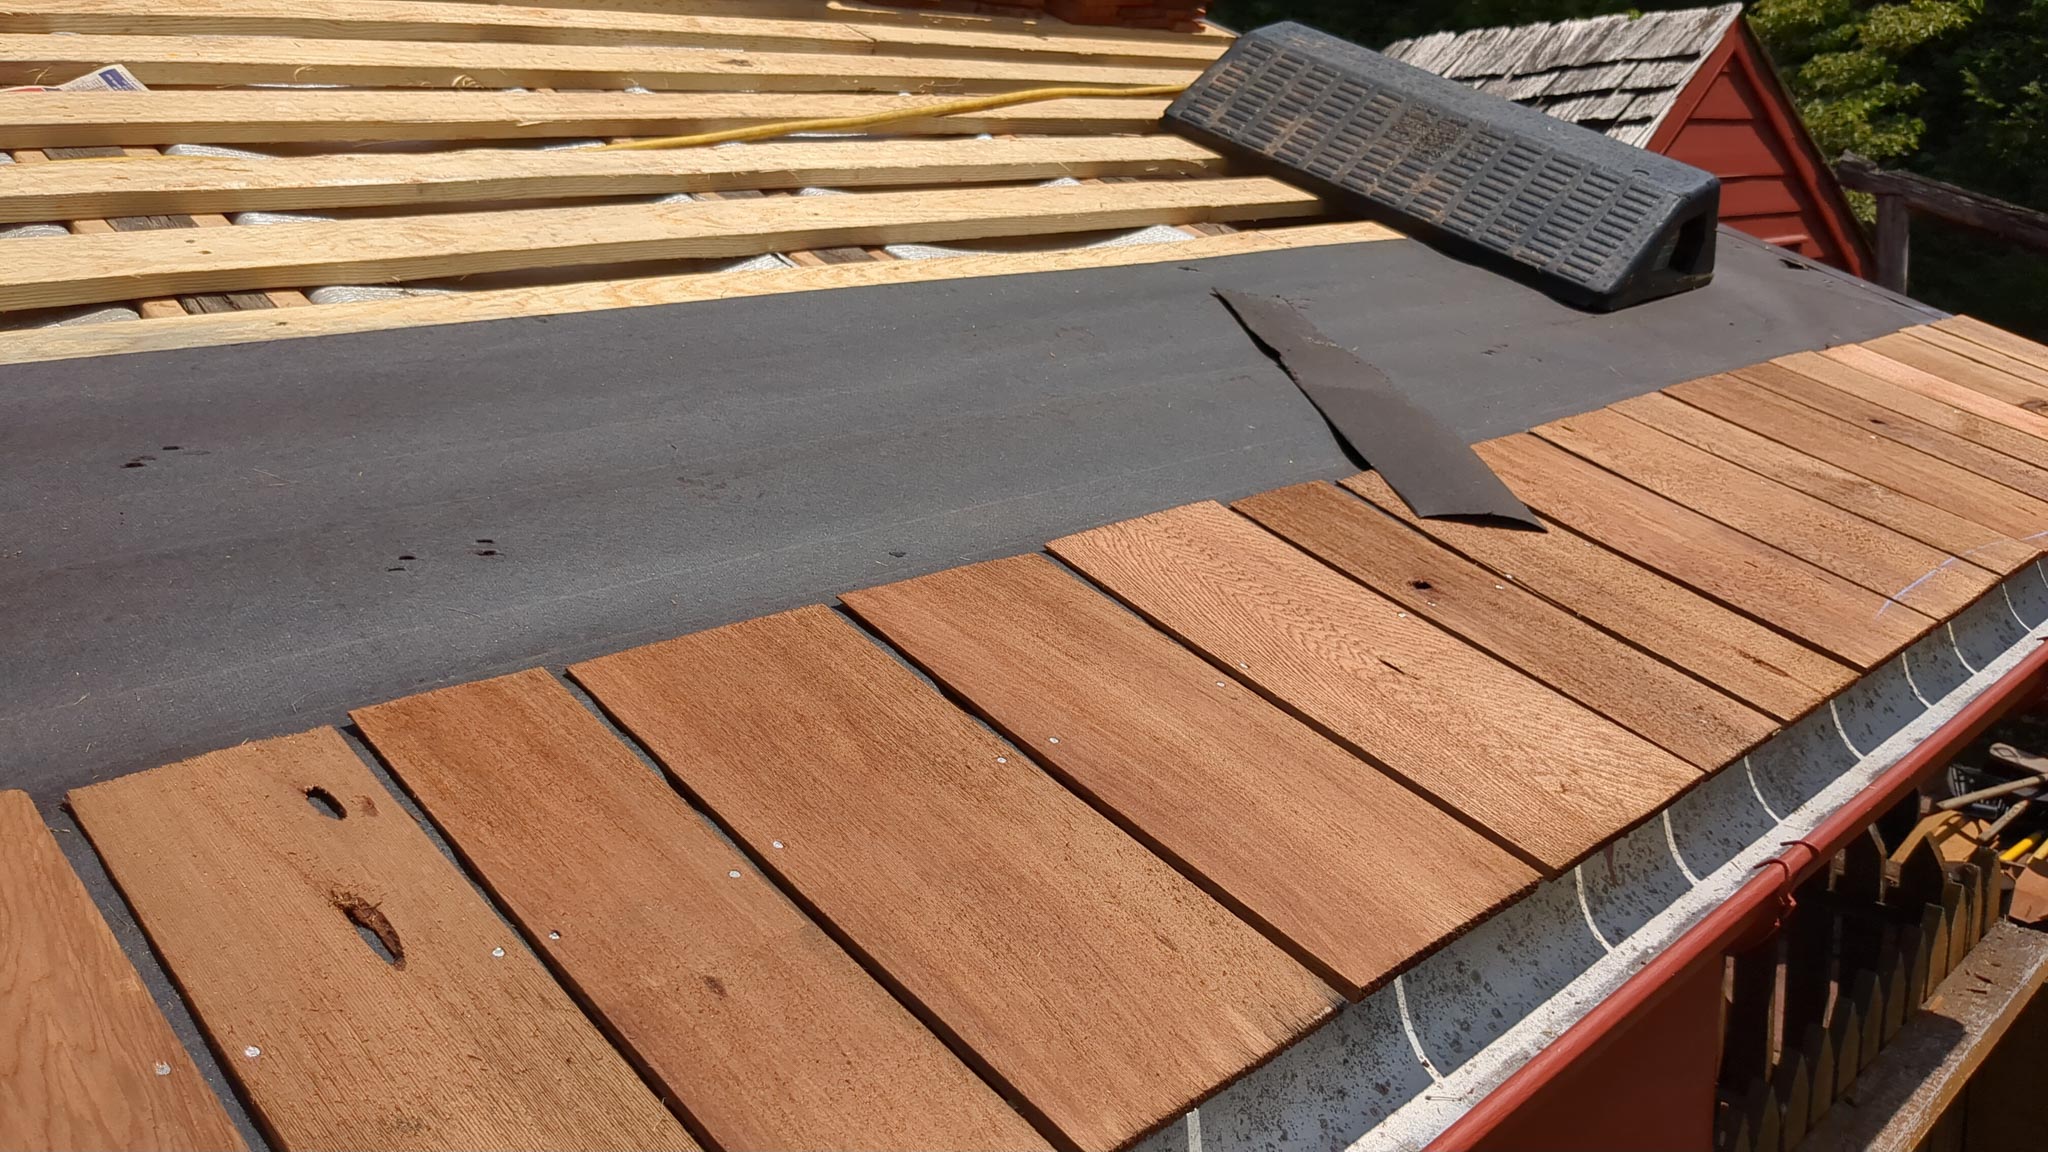
The full process:
- 1x4 purlins, 7" on center
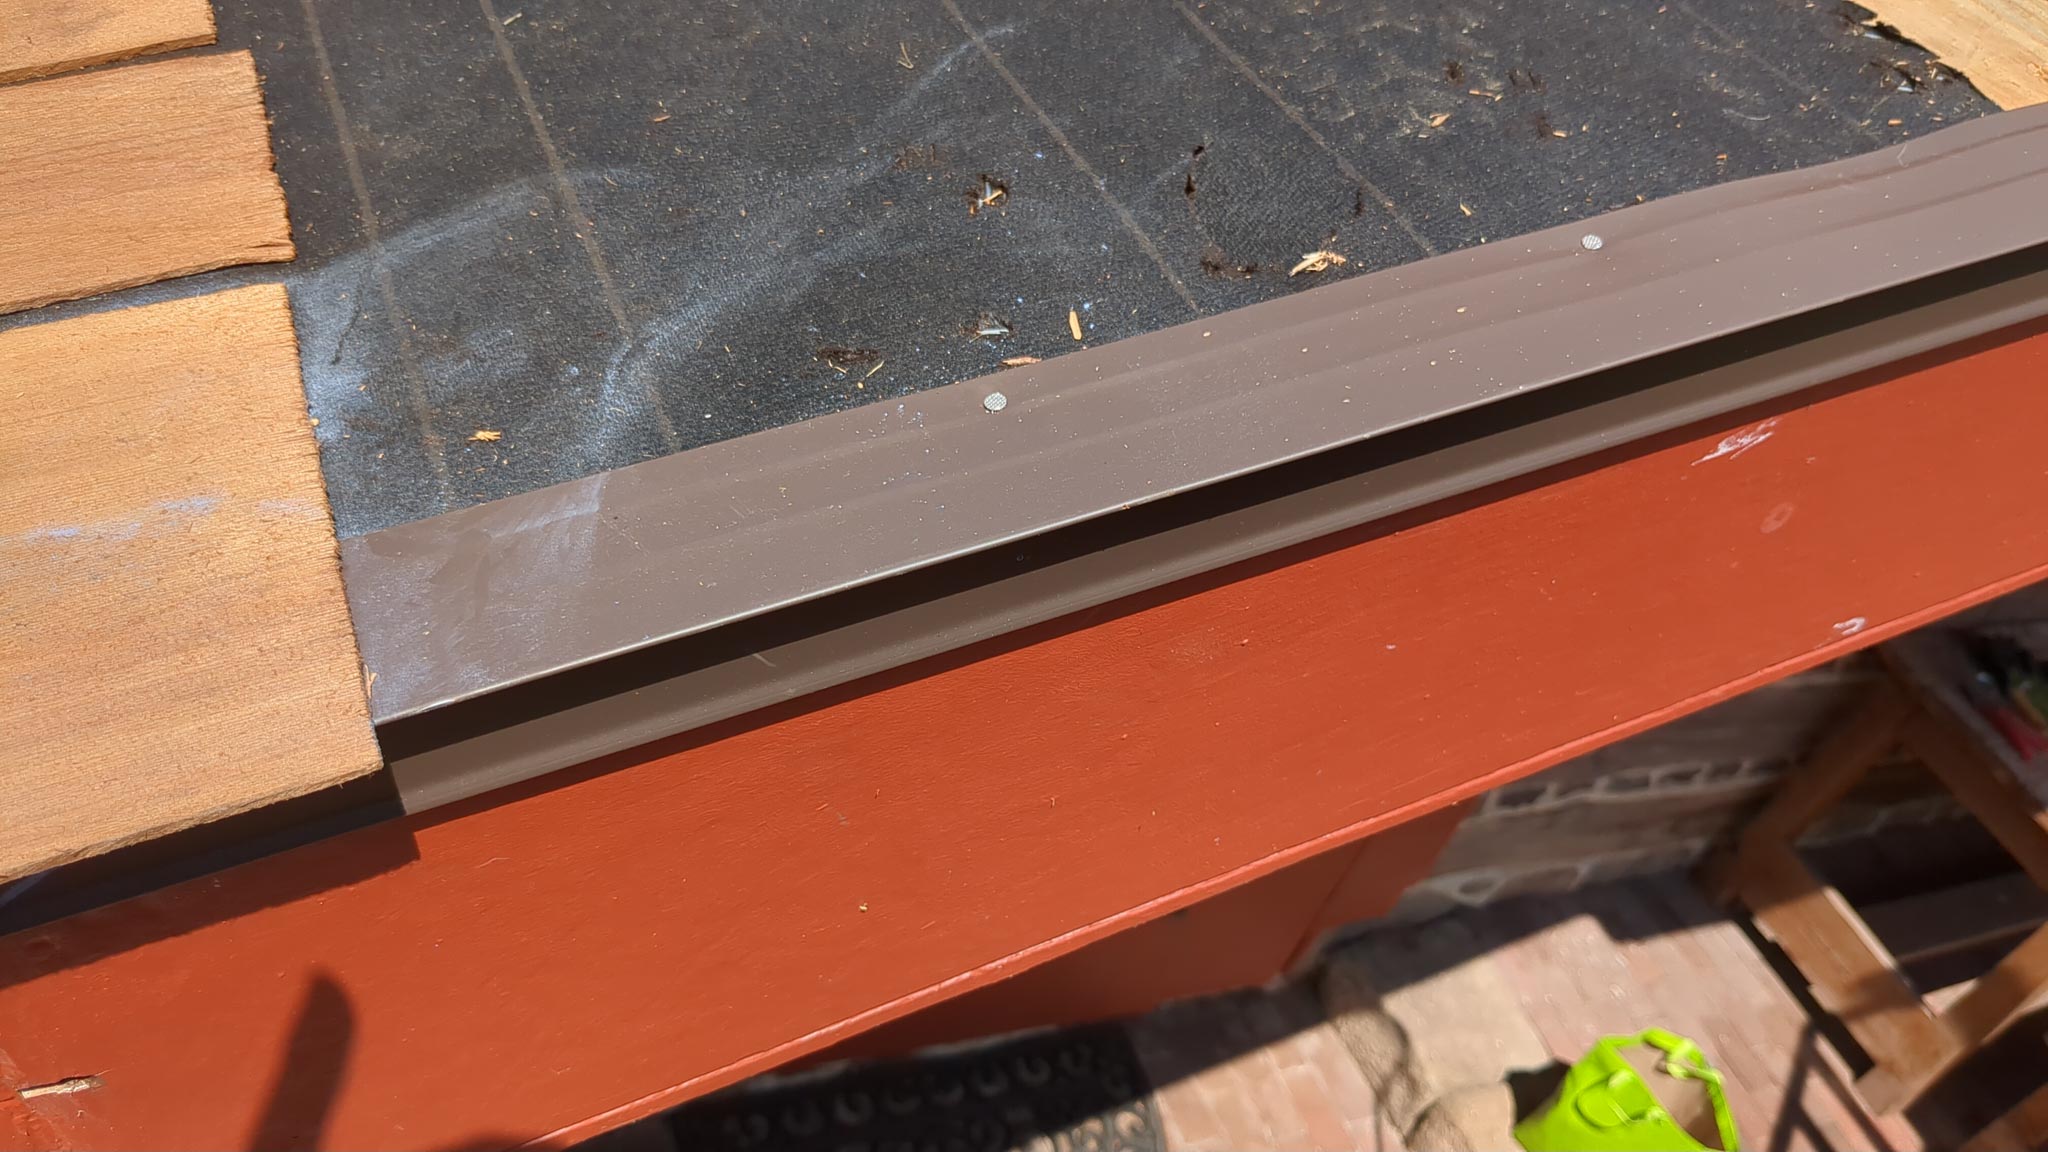
- Drip-edge all the way around
- 36" tar felt to start the eaves
- 15" shingles as the starter row (1.5" overhang past drip edge/ over gutter; 1" overhang past rake edge).
- 24" shakes nailed 8.5" above butt
- Shake rows spaced 7"
- Tar felt applied 14" above butt
Completion
While we were in the midst of this project, focused on the technical aspects, it was easy to lose the forest for the trees and forget why we're doing this.
Yes, the higher ideals of beauty and tradition..
But also- we all secretly want a Hobbit-house.
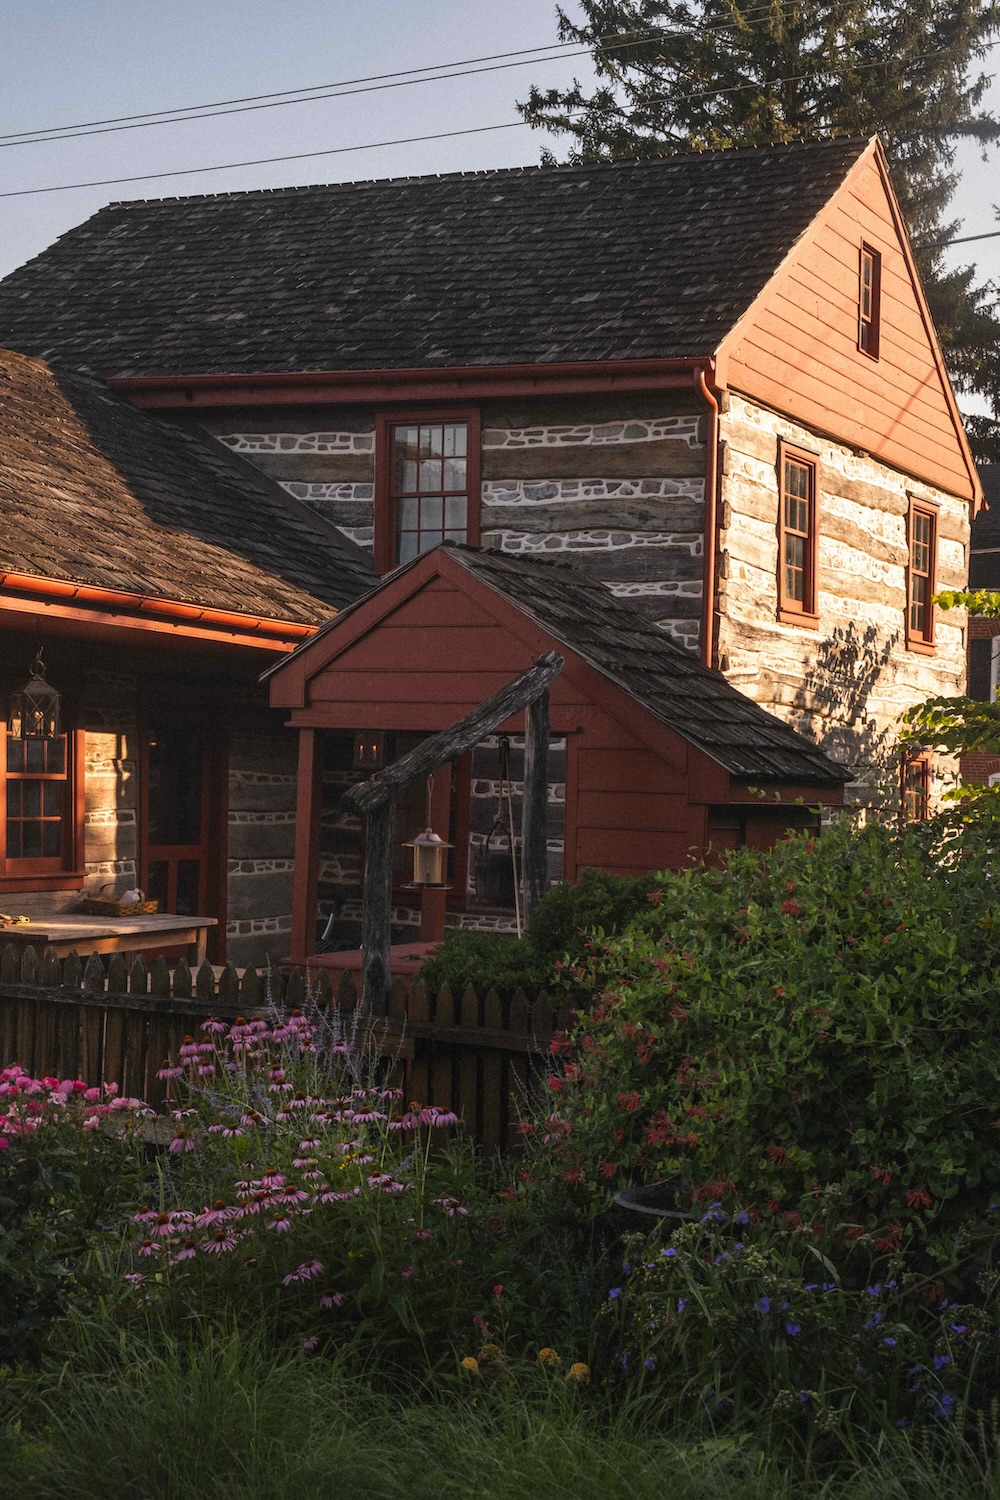 Before
After